Step-by-Step Guide: How to Draw Snow Globe (Easy & Fun)
Are you ready to capture a little bit of magic on a piece of paper? Today, we are going to learn how to draw snow globe.
Snow globes are like tiny, frozen worlds. You shake them up, and suddenly, a quiet little scene turns into a magical winter wonderland. The best part? You don’t need to wait for winter to enjoy them. With a pencil and some colors, you can invent your very own world inside a glass bubble right now.
This guide is going to be your best friend for drawing snow globes. Whether you want to draw a classic snowman, a Christmas tree, or even a spooky Halloween globe, we have it all here. Grab your pencils, get comfortable, and let’s make some art.
What You Will Need
Before we start drawing, let’s make sure we have the right tools. You don’t need expensive art supplies. Here is your treasure chest checklist:
- A Pencil: Regular HB pencils are great. Make sure it is sharpened.
- An Eraser: Because mistakes are just happy accidents waiting to be fixed.
- Paper: Drawing paper, printer paper, or a sketchbook.
- A Black Marker: For outlining your drawing later to make it “pop.”
- Something Round (Optional): If you struggle to draw a perfect circle, grab a bowl, a cup, or a roll of tape to trace.
- Colors: Crayons, colored pencils, markers, or even watercolors.
- Special Magic Tool: A white gel pen or white paint (optional, but great for snow).
The Secret Shape: Understanding the How to Draw Snow Globe
Drawing a snow globe might look hard because it is made of glass, but it is actually just two simple shapes put together.
1. The Circle (The Globe): This is the glass part. It holds all the water, snow, and the magical scene.
2. The Rectangle or Trapezoid (The Base): This is the stand that the globe sits on. It stops the ball from rolling away.
The Trick: When we draw a snow globe, we don’t just draw a circle on top of a square. We have to imagine the glass ball is sitting inside the stand slightly. Don’t worry, I will show you exactly how to do this in the steps below.
Project 1: The Classic Snowman Globe (Super Easy)
Let’s start with the most famous snow globe of all: The Snowman. This is perfect for beginners.
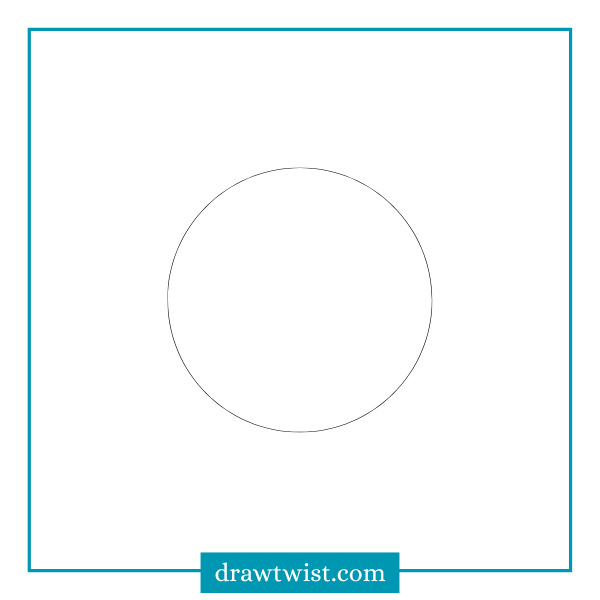
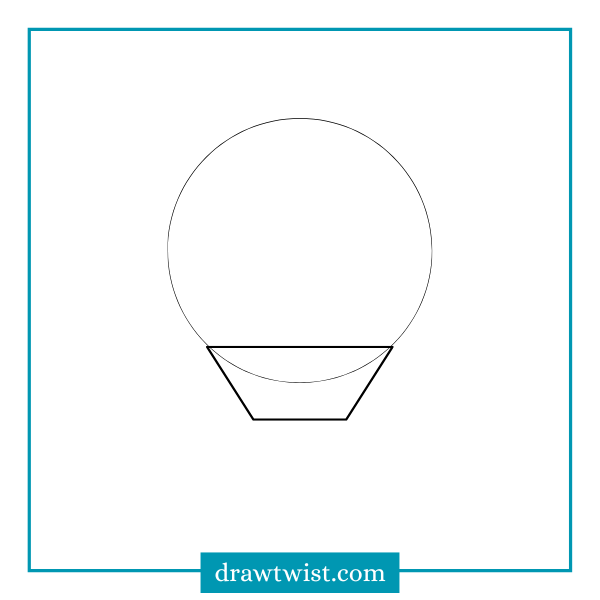
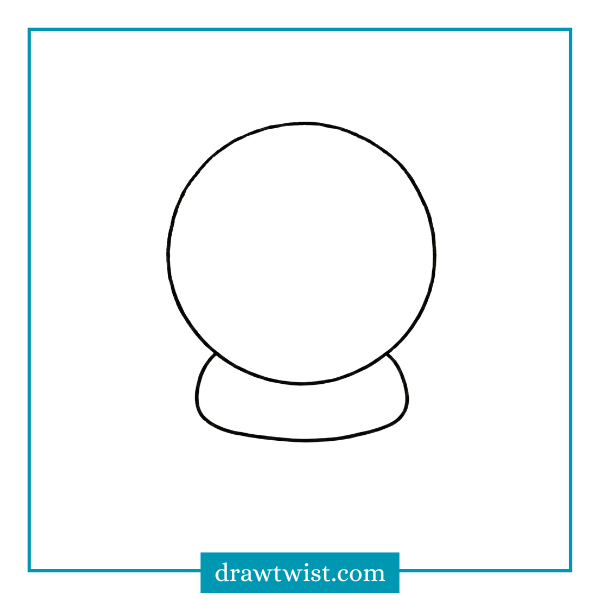
Step 1: The Giant Circle
Start by drawing a big circle in the middle of your paper.
- Tip: Draw lightly. If you press too hard, it will be hard to erase later.
- Hack: If you want a perfect circle, place a small bowl upside down on your paper and trace around it.
Step 2: The Base
Now, let’s give our globe a place to sit.
- Go to the bottom of your circle.
- Draw a slightly curved line across the bottom section of the circle. This is the top of the base.
- Draw two lines coming down from the sides of that curved line.
- Connect them at the bottom with another curved line.
- It should look like a cup or a flower pot holding the circle.
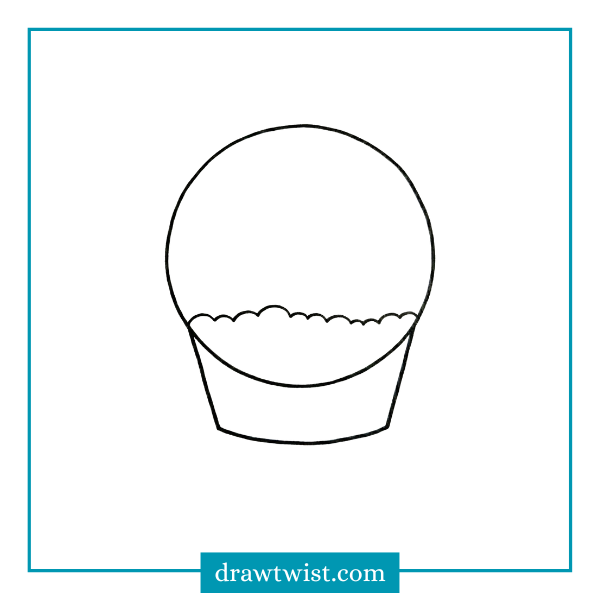
Step 3: Erase the Overlap
Look at where the base goes “inside” the circle. You want to keep the curve of the base, but erase the bottom part of the circle that is hidden inside the stand.
- Now it looks like a glass ball sitting securely in a holder.

Step 4: Draw the Snow Floor
Inside the glass ball, we need ground for the snowman to stand on. Draw a wavy, bumpy line near the bottom of the circle (but above the base). This is the fluffy snow.
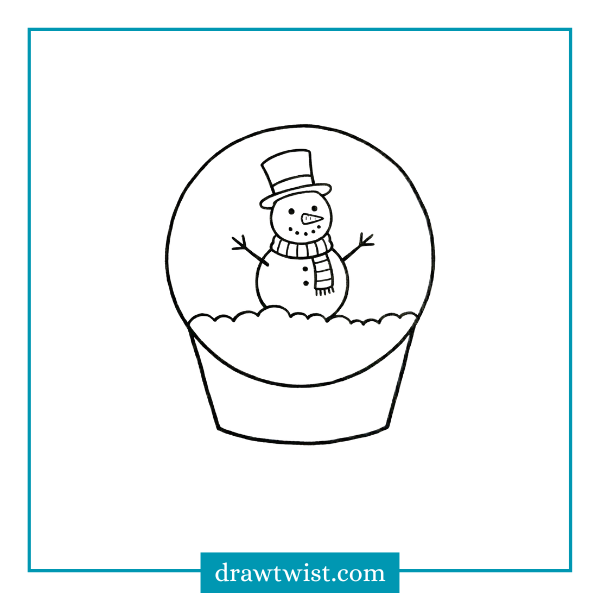
Step 5: The Snowman
Now for the star of the show.
- Draw a medium circle near the bottom of the snow.
- Draw a smaller circle on top of that one (the head).
- Give him a carrot nose (a tiny triangle).
- Draw stick arms (lines with little fingers).
- Add coal eyes and a smile using dots.
- Don’t forget a scarf and a hat.
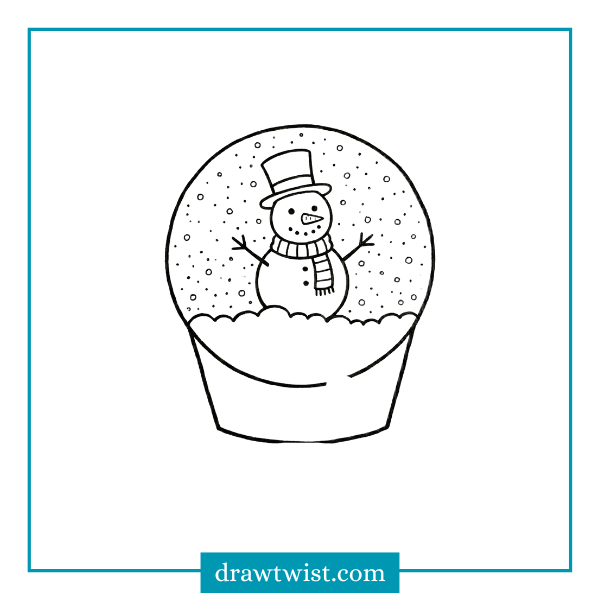
Step 6: Let it Snow
This is the fun part. Draw tiny circles all over the empty space inside the globe. Some can be dots, and some can be tiny circles. These are the snowflakes swirling around.
Project 2: The Winter Forest (For Nature Lovers)
Ready for something a little different? Let’s draw a peaceful forest inside our globe.
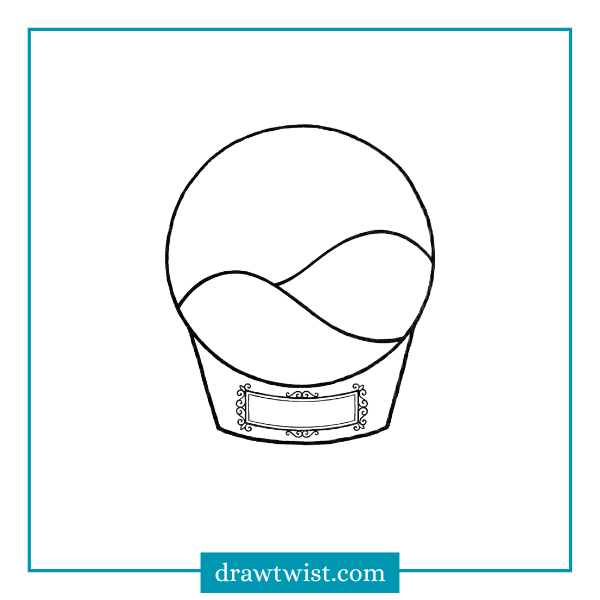
Step 1: The Globe and Base
Just like in Project 1, draw your circle and your base.
- Creative Twist: Make the base looking fancy this time. Draw a little plaque on the front of the base. You can write “Winter” or “2026” inside it later.

Step 2: The Rolling Hills
Inside the globe, instead of a flat snow floor, draw two curvy hills. Draw one hill that starts low and goes high, and another behind it. This adds depth (it makes the drawing look 3D).
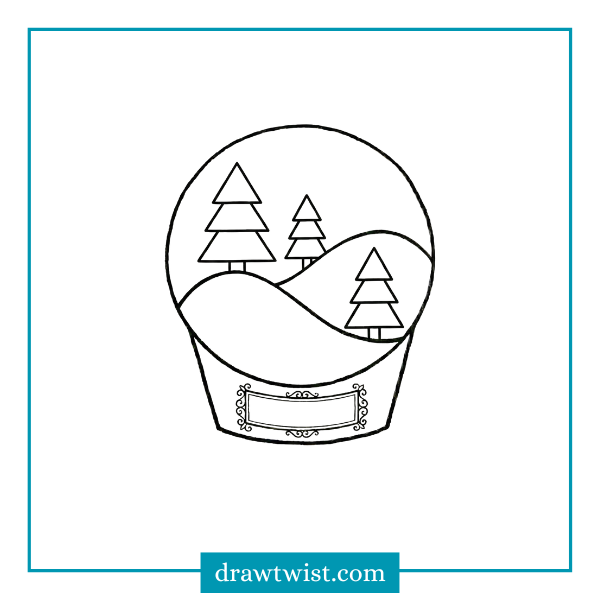
Step 3: The Pine Trees
Pine trees are easy. They are just triangles stacked on top of each other.
- Draw a small triangle near the top of the hill.
- Draw a slightly bigger triangle underneath it, overlapping a bit.
- Draw a third, bigger triangle at the bottom.
- Add a tiny rectangle at the very bottom for the trunk.
- Draw 2 or 3 trees of different sizes.
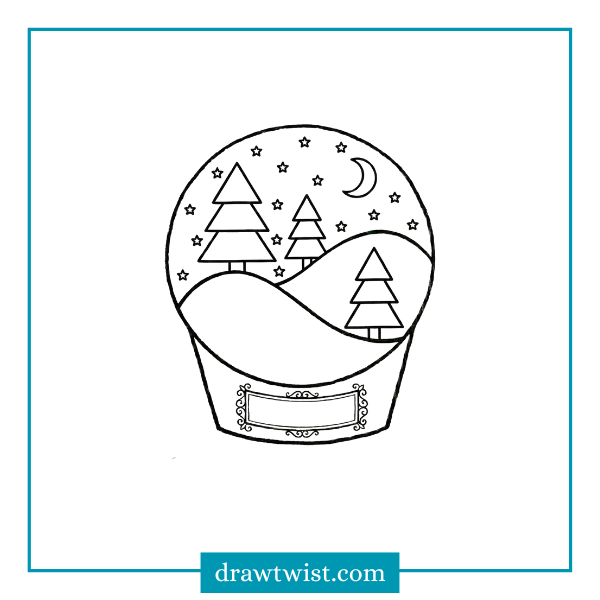
Step 4: The Moon and Stars
Since this is a quiet forest, maybe it is nighttime? Draw a tiny crescent moon in the upper corner of the globe. Add small star shapes instead of just snow dots.
Step 5: Detail the Base
Let’s make the stand look like wood. Draw faint vertical lines (up and down) on the base to make it look like wood grain texture.

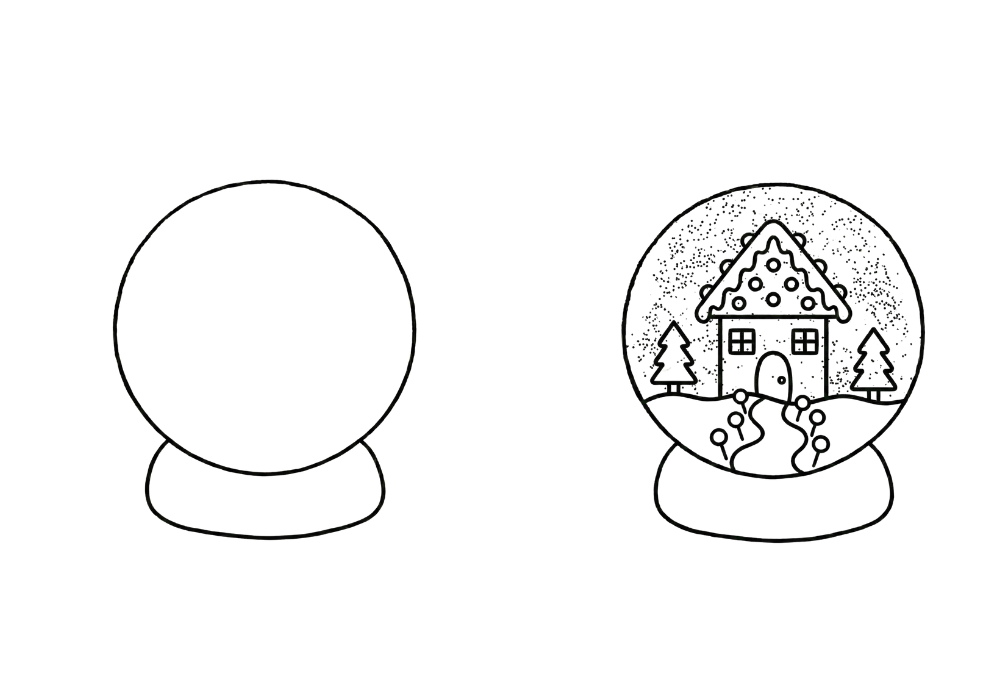
Project 3: The Gingerbread House (Yummy & Cute)
This one is for kids who love sweets. We are putting a candy house inside the globe.
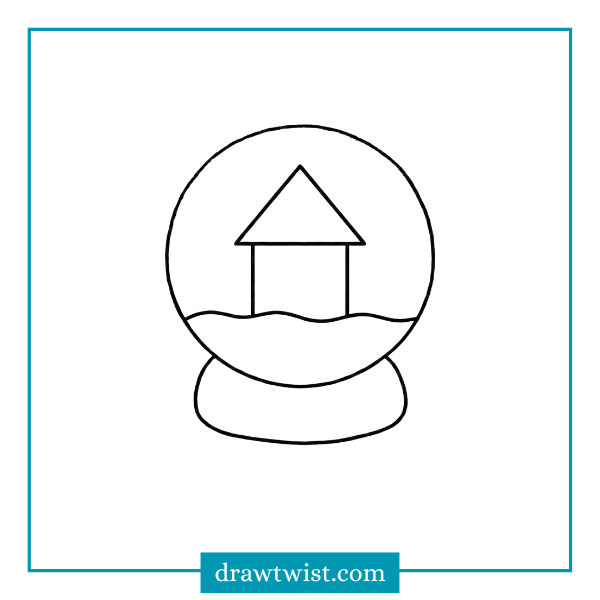
Step 1: The Shape
Draw your circle and base. Let’s make the base round this time, like a ball of dough. Just draw a squashed oval at the bottom instead of a square shape.
Step 2: The House Outline
- Draw a square inside the globe sitting on the snow.
- Draw a triangle on top of the square for the roof.
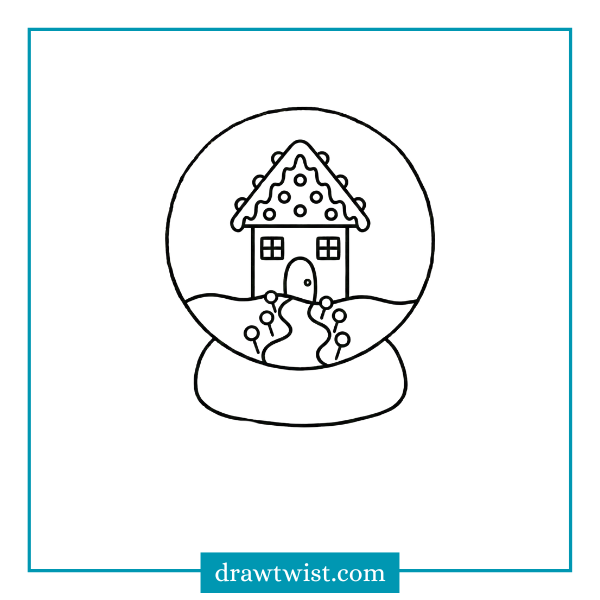
Step 3: Candy Decorations
Now, turn that house into a cookie.
- Door: Draw a gumdrop shape (an arch) for the door.
- Roof: Draw a wavy line on the roof to look like icing. Draw circles on the roof to look like candies or M&Ms.
- Windows: Draw square windows with a “plus” sign (+) in the middle.
- Path: Draw two wiggly lines leading to the door to make a path. Draw little circles along the path these can be lollipops.
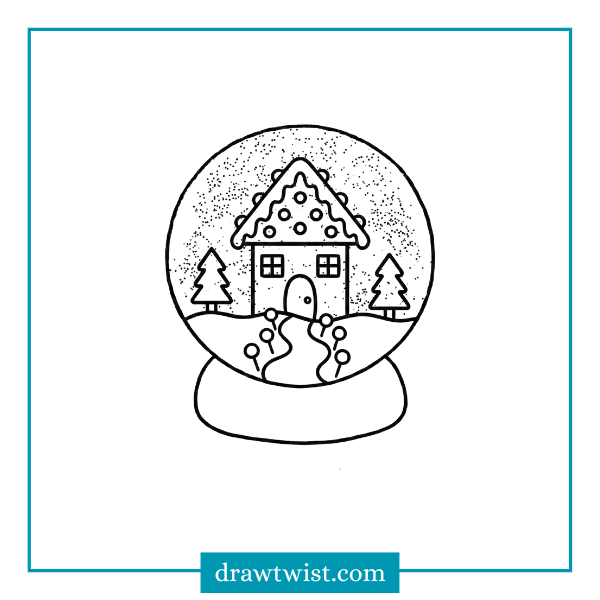
Step 4: The “Sugar” Snow
When you draw the falling snow in this one, imagine it is powdered sugar. Draw lots of very tiny dots clustered together.
How to Color Like a Pro: Making the Glass Look Shiny
Drawing the outline is only half the fun. Coloring is where the magic happens. Here is the secret to making your snow globe look like real glass.
The “Reflection” Trick
Glass reflects light. To show this in a drawing, you need to leave some parts white or very light blue.
Step-by-Step Coloring:
- The Background (Inside the Globe): Don’t color the sky inside the globe dark blue or black, even if it’s night. Keep it light so the glass looks transparent. A very light icy blue is perfect.
- Technique: Color very gently with a blue pencil. Press harder near the edges of the circle and get lighter as you move to the middle. This makes the globe look round.
- The Shiny Spot (Highlight): Pick a side (left or right). Near the top curve of the glass, draw a small “comma” shape or a small oval. Do not color inside this shape. Leave it pure white. This looks like the light is hitting the shiny glass.
- The Objects: Color your snowman, trees, or house with bright colors so they stand out against the light blue background.
- Tip: Use red and green for a holiday feel, or pinks and purples for a fantasy feel.
- The Snow: If you are using colored pencils, the snow can be hard to see.
- Pro Tip: Use a White Gel Pen or a tiny bit of White Poster Paint on a Q-tip. Dot it over your colored drawing. This makes the snow look bright white and magical.
- The Base: Make the base dark to contrast with the light glass. Dark brown, deep red, or gold look great. Press hard with your colors here to make it look solid and heavy.
Drawing a snow globe is one of the coziest art projects you can do. It allows you to create a tiny, perfect world where everything is calm, bright, and happy.
Remember, there is no “wrong” way to draw. Your snow globe might have purple snow, or a dinosaur inside and that makes it awesome because it is yours.
Read More: Snowflake Doodle Ideas, How to Draw Pine Tree and Winter Tree