
How to Draw Pine Tree and Winter Tree
Learning how to draw pine tree and winter tree especially these trees is one of the most enjoyable ways to grow. Trees are extremely versatile they appear in nature scenes, holiday illustrations, children’s books, doodle journals, landscape drawings, and festive designs. Whether you’re a complete beginner or someone who wants to draw of tree drawings makes the process fun and easy.
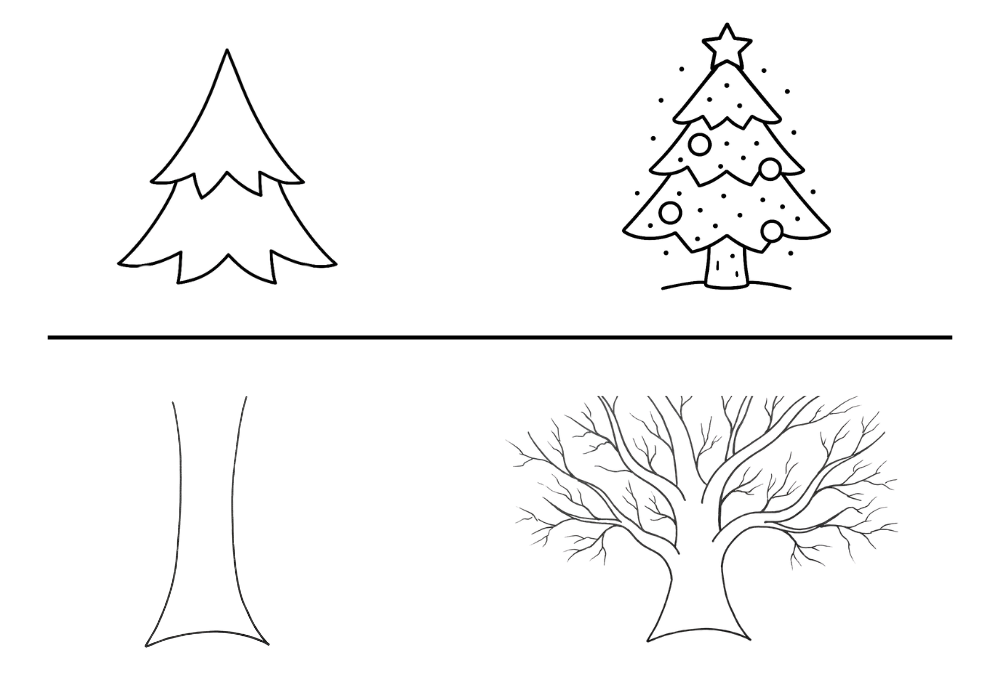
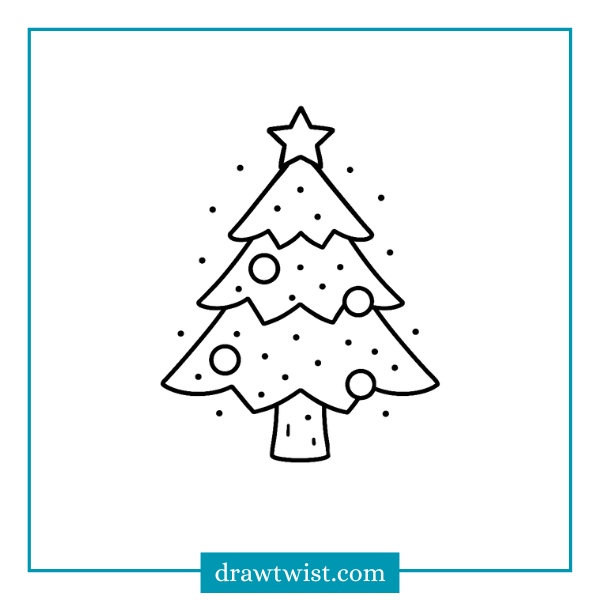
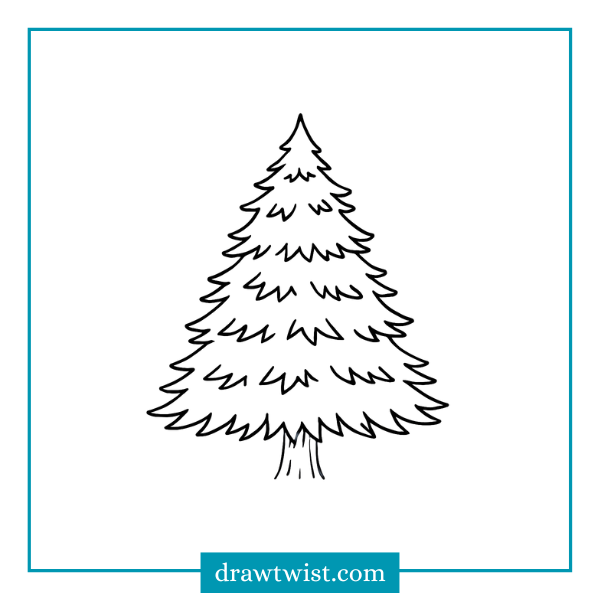
Tutorial 1: How to Draw a Simple Pine Tree (Perfect for Beginners, Kids)
If you want to learn the basics of drawing pine trees, this is the best place to start. A simple pine tree typically follows a triangular shape, making the process easy and enjoyable.
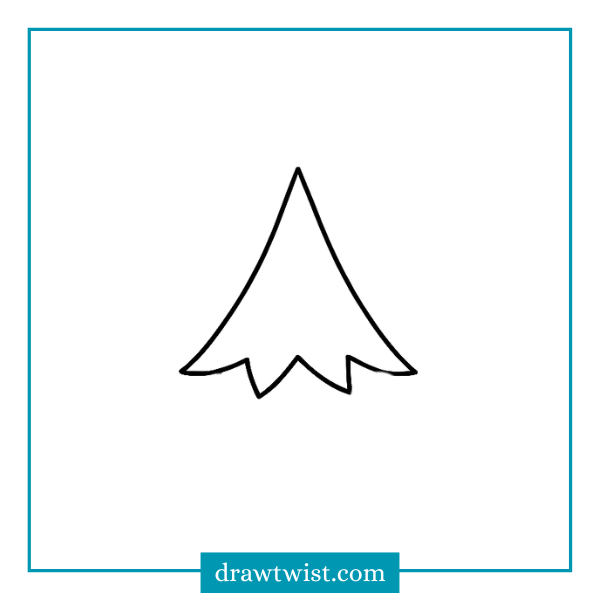
Step 1: Draw a Tall Triangle
Begin by sketching a long, narrow triangle. This is the frame of your pine tree. Don’t worry about perfection the triangle is only a guide. A slightly rounded or uneven shape will give the tree a more natural and friendly look.
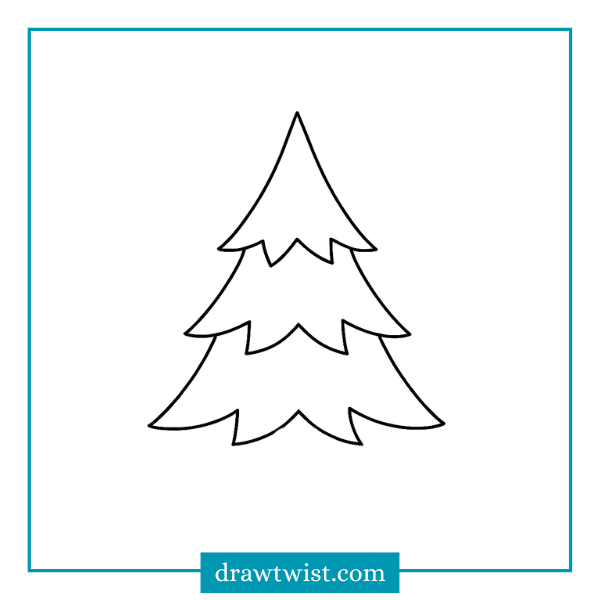
Step 2: Add Three Layered Zig-Zag Sections
Inside the triangle, draw three wide zig-zag or “V-shaped” layers. These represent the pine needle branches.
- The top layer should be small and narrow.
- The middle layer should be wider.
- The bottom layer should be the widest.
This creates a classic tiered pine tree structure.
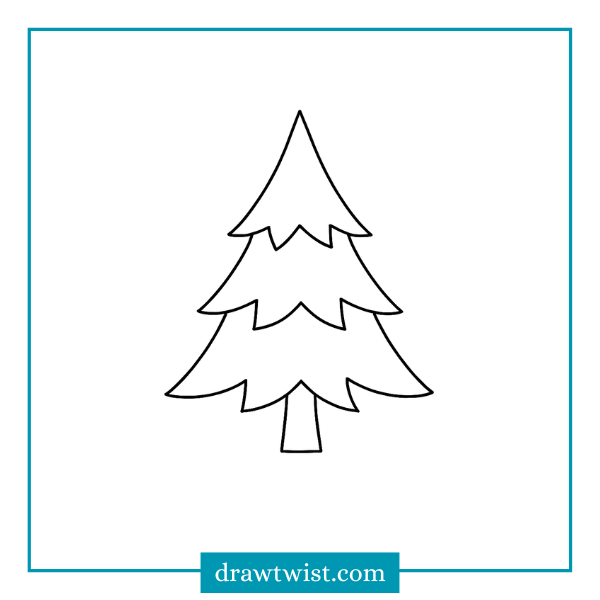
Step 3: Draw the Tree Trunk
Sketch a small rectangle or stump at the bottom of the triangle. A pine tree trunk is usually short compared to the height of the tree. For a cartoon style, keep the trunk smooth and simple. For a more rustic feel, you can add slight bark lines or uneven edges.
Step 4: Add Optional Details
Depending on your style, you can add:
- Snow on branch tips
- Tiny dots to create needle texture
- Shading on the left side
- A star or ornaments for a Christmas theme
Your simple pine tree is complete adorable, quick, and perfect for doodles or holiday drawings.
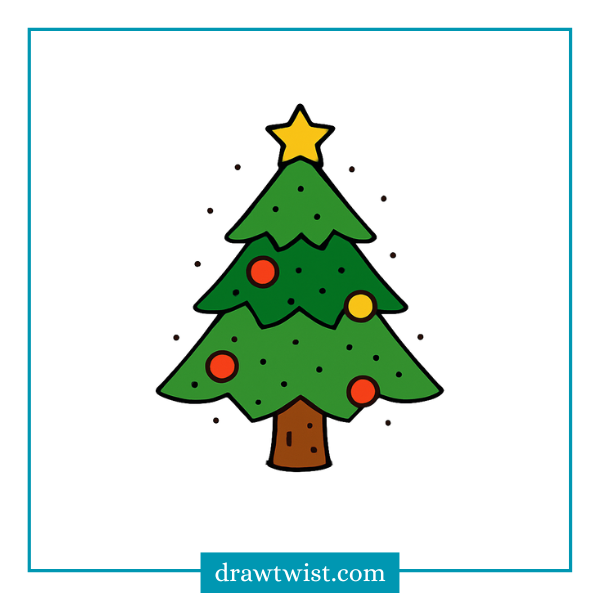
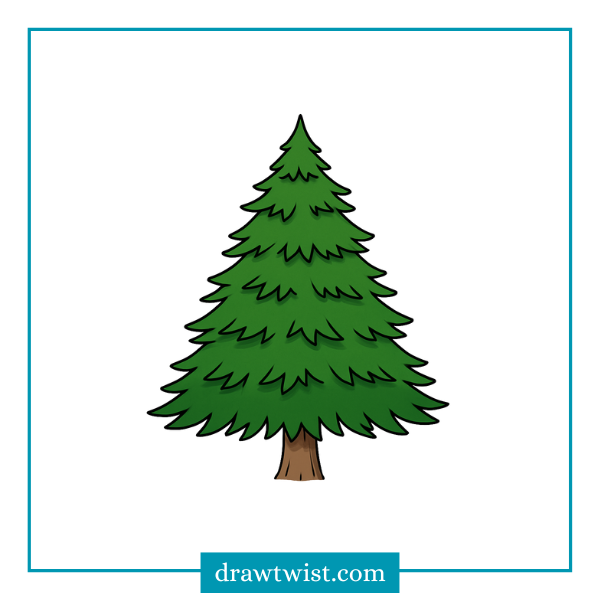
Step 5: Color the Tree
Use brown for Trunk, Green for Layers, and Yellow and Red for details.
Tutorial 2: How to Draw a Realistic Pine Tree (Detailed, Textured, and Natural)
For artists who want a more advanced tree drawing, this tutorial shows you how to create a lifelike pine tree with depth, texture, and volume. Realistic pines have layered branches that cluster naturally around the trunk. Instead of drawing a perfect triangle, you’ll now focus on organic shapes.
Step 1: Draw a Light Vertical Guideline
Start with a single soft vertical line. This is the center of your tree and helps maintain symmetry. You will build branches around this line.
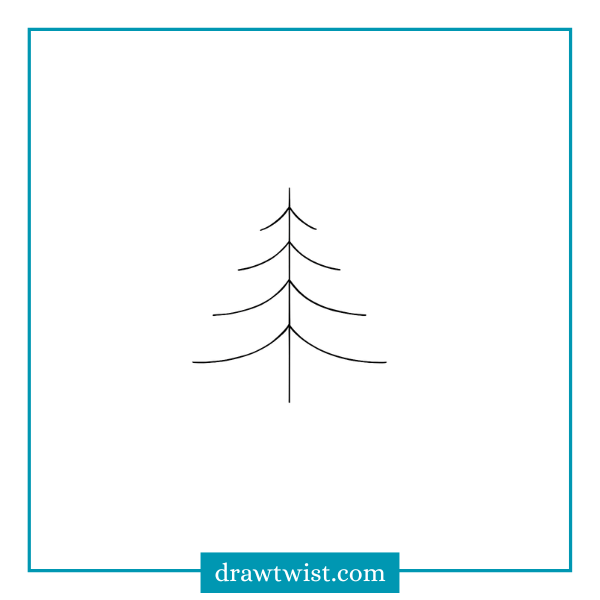
Step 2: Add Layered Branch Sketches
Draw horizontal or slightly curved branch guidelines across the trunk.
- The bottom branches should be long
- Middle branches medium-sized
- Top branches short and narrow
Your tree will begin to take shape, even without leaves.
Step 3: Add Natural Needle Clusters
Instead of perfect lines, draw irregular jagged clusters around each branch guideline. Think of these clusters as shaggy triangles with soft, uneven edges. Real pine trees are not perfectly shaped they grow wild and full.
Focus on:
- Varying needle lengths
- Occasional gaps
- Thickness that increases toward the bottom
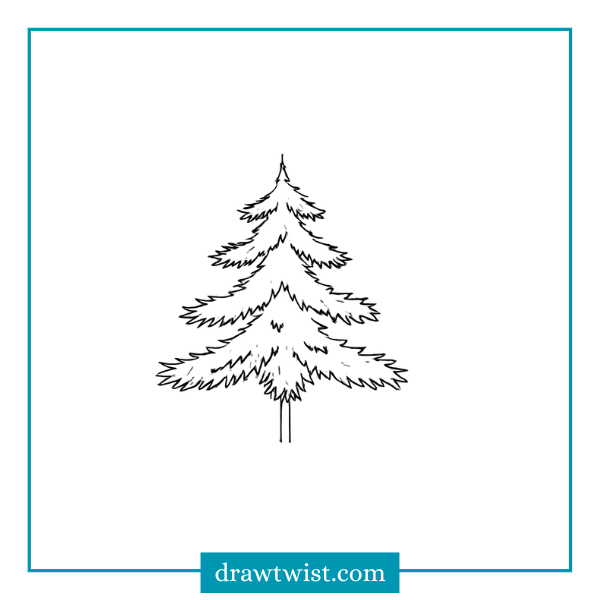
Step 4: Fill in the Tree to Create Fullness
Real pine trees have overlapping branches, so add more needle clusters in between the main layers.
This gives your tree:
- Weight
- Volume
- A realistic silhouette
Step 5: Color the Tree
Use brown for trunk and green for tree.
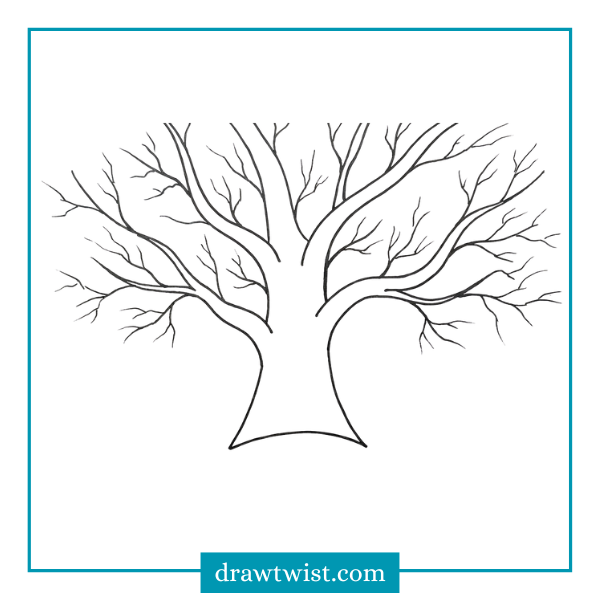
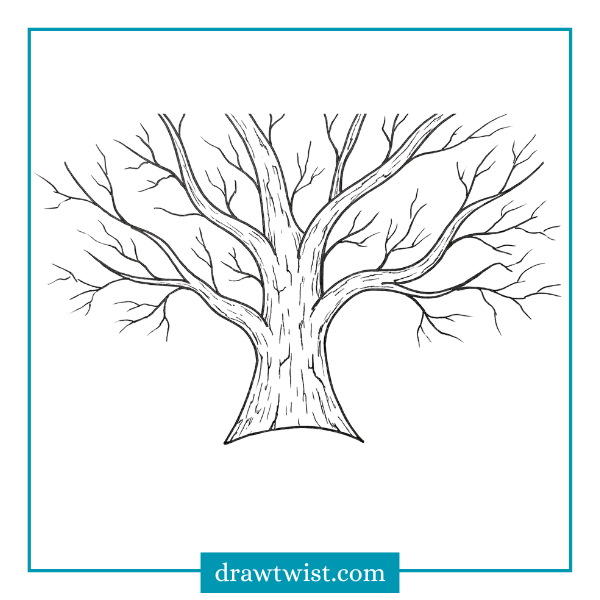
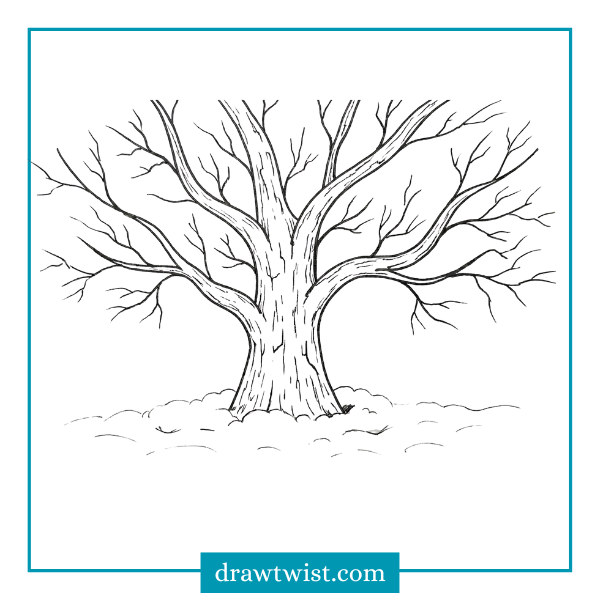
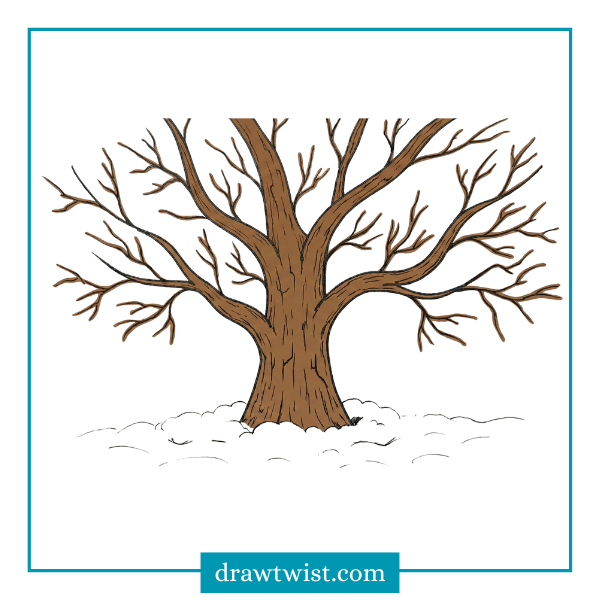
Tutorial 3: How to Draw a Bare Winter Tree (Beautiful, Elegant, and Great for Line Art)
A bare winter tree shows its branch structure clearly, making it a fantastic drawing subject for improving your line confidence and anatomy of branching.
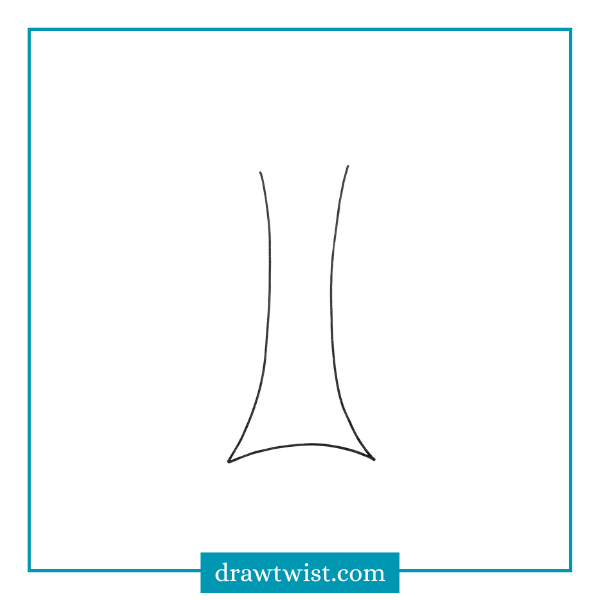
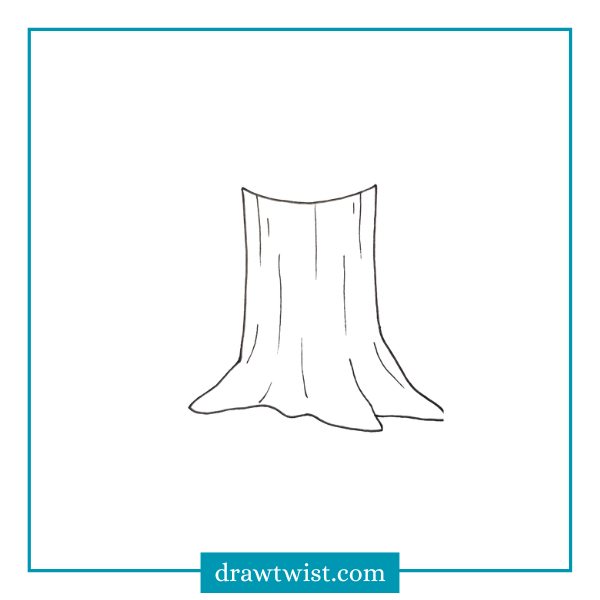
Step 1: Draw the Tree Trunk
Sketch two slightly curved vertical lines. Connect them at the bottom. Make the trunk wider at the base and narrower at the top it creates a strong foundation.
Step 2: Add the Main Branches
Draw 3–5 large branches that extend upward and outward.
- Avoid straight lines
- Let each branch curve naturally
- Vary thickness as they go outward
A winter tree has a dramatic silhouette, so don’t hesitate to exaggerate branch direction.
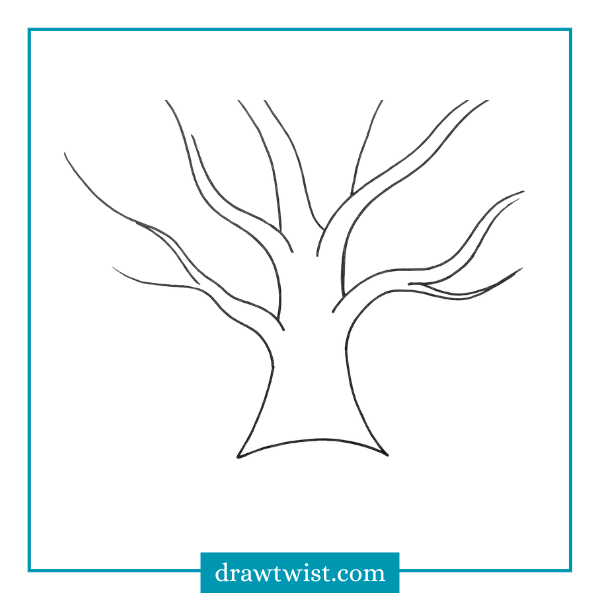
Step 3: Add Secondary & Tertiary Branches
From each large branch, draw smaller branches that split into thin, sharp lines.
These branches should:
- Gradually thin out
- Point in different directions
- Look jagged, natural, and delicate
Think of lightning bolts thin, branching, and unpredictable.
Step 4: Add Bark Texture
Use short strokes to create tree bark patterns.
You can add:
- Vertical lines
- Slight cracks
- Rough textures
- Uneven marks
This makes the tree feel rugged and wintry.
Step 5: Add Ground Shadow or Snow
Ground shadows help your tree look grounded.
For snow:
- Draw soft mounds at the base
- Add small dips to show thickness
- Keep strokes light and fluffy
This creates a peaceful winter scene.
Step 6: Color
Finally, bring your tree to life with color.
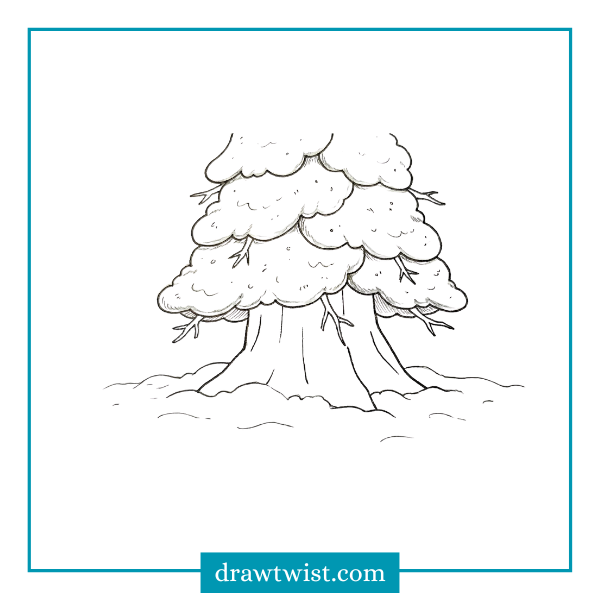
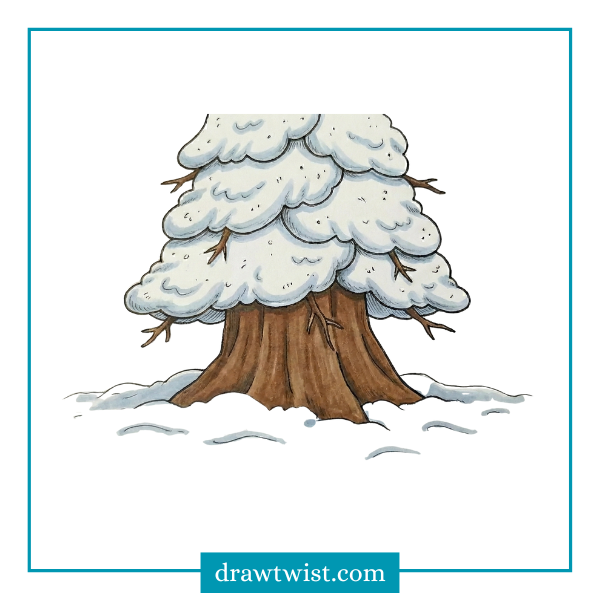
Tutorial 4: How to Draw a Snow-Covered Winter Tree (Soft, Fluffy, and Cozy)
Snow-covered trees look magical and are great for holiday illustrations or snowy landscapes. Instead of leaves, you’ll draw fluffy snow piles.
Step 1: Draw the Basic Trunk
Sketch a short, thick trunk. Most snowy trees appear weighed down, so give the trunk a sturdy shape.
Step 2: Add Snow Clumps
Draw fluffy, cloud-like shapes stacked on top of each other, forming a tree silhouette. Each snow clump should be:
- Rounded
- Uneven
- Overlapping the one below
These shapes should feel soft and piled high.
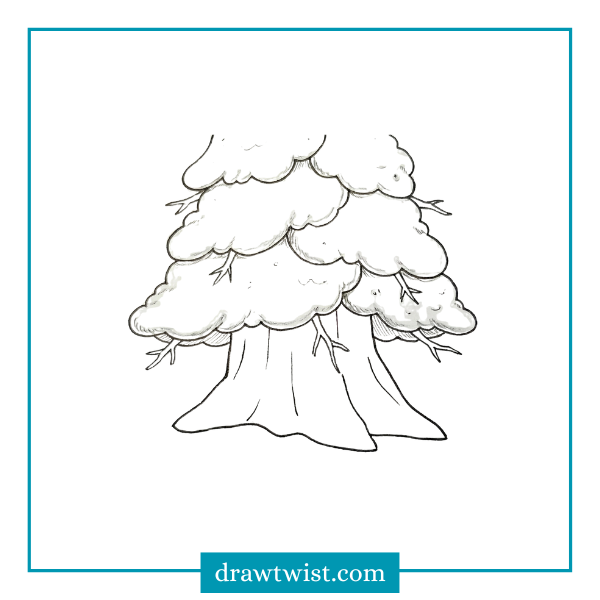
Step 3: Add Hidden Branches
Draw a few small branches sticking out from beneath snow layers. Don’t draw too many snow hides most of a winter tree’s structure.

Step 4: Add Snow Texture
Use curves and soft lines to show weight and softness.
Add:
- Slight shading at the bottom of each clump
- Dots and tiny marks for snow grain
- Curved dips that mimic snow thickness
This makes the snow feel heavy and realistic.
Step 5: Add Ground Snow
Draw uneven snow piles at the base. A snowy tree looks more complete when it sits in a winter environment rather than floating alone on the page.
Step 6: Color the Tree
Finally, bring your drawing to life with color. Color the trunk brown and the snow white, adding blue-grey shading to the snow for a cool, wintry feel.
Bonus Tips for How to Draw Pine Tree and Winter Tree
These universal drawing tips will help improve ANY tree you sketch pine, leafy, winter, or fantasy.
1. Start loose and refine later
Never start with heavy, dark lines.
Light guidelines help maintain proportions.
2. Observe real trees
Notice:
- How branches split
- How needles clump
- How snow settles
Real-life observation is the best reference.
3. Keep edges irregular
Nature is not perfect. Slight asymmetry makes trees look authentic.
4. Use line weight variation
Thicker lines = foreground elements
Thinner lines = delicate details
5. Add shading to show light direction
Shading the lower left or right of branches creates depth instantly.
6. Build layers slowly
Trees look best when details gradually accumulate instead of being drawn all at once.
What Makes Pine Trees and Winter Trees Great for Drawing?
Trees can look complex when you first observe them, but they all follow natural patterns. Pine trees have triangular structures with layered needles, while winter trees reveal their branches, making them fantastic for line-art practice. Snow-covered trees introduce volume, softness, and shading techniques.
Here’s why these subjects are perfect for artists:
They help you practice shapes and structure
Most trees start with simple forms like triangles, circles, and lines.
They train your eye for texture
Needles, bark, branches, and snow each require distinct line styles.
They help build shading techniques
Trees often rely on light-and-shadow to show depth and realism.
They are perfect for beginners and advanced artists
You can simplify or complicate a tree drawing based on your style.
Drawing pine trees and winter trees is a rewarding skill that improves your observation, line control, shading, and creativity. Whether you prefer simple doodle-style drawings or more realistic illustrations, the four expanded tutorials in this guide give you everything you need to draw beautiful trees with confidence.
From the simple beginner pine tree to the snowy winter tree, each method teaches different artistic concepts that you can apply to other subjects as well. With practice, you’ll be able to draw forests, winter scenes, and nature landscapes that feel alive and expressive.
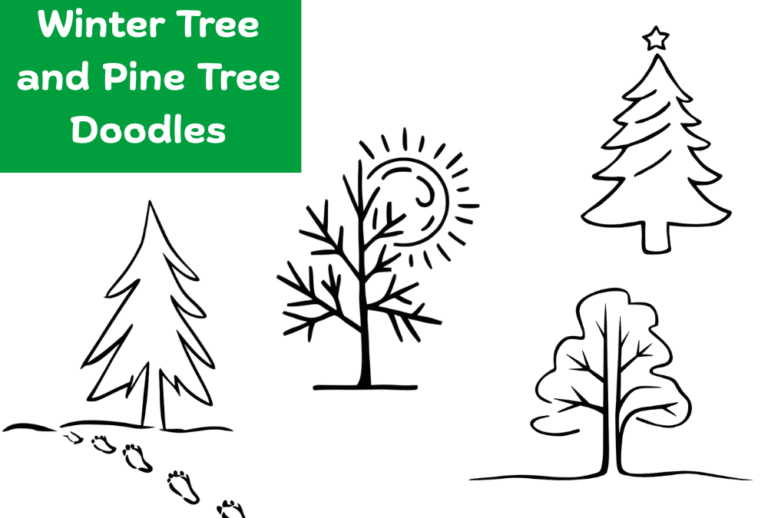
Read more: Winter Tree and Pine Tree Doodles, How to Draw Snowman, Winter Cabin and Snowy House Doodle
![29 Halloween Doodles Anyone Can Draw [Cute & Spooky]](https://drawtwist.com/wp-content/uploads/Halloween-Doodles-768x518.png)