How to Draw Penguin (Easy Step-by-Step Guide)
Are you ready to take a trip to the freezing cold, snowy, and magical world of Antarctica? Grab your pencils, because today we are going to learn how to draw penguin.
Penguins are some of the most loved animals on the planet. They waddle when they walk, they slide on their bellies like toboggans, and they look like they are wearing fancy little tuxedos. But the best part? They are surprisingly easy to draw.
Whether you are 5 years old or 50, this guide has something for you. We aren’t just going to draw one penguin; we are going to explore three different ways to draw them, learn cool facts, and even discover how to color them to look like real art masterpieces.
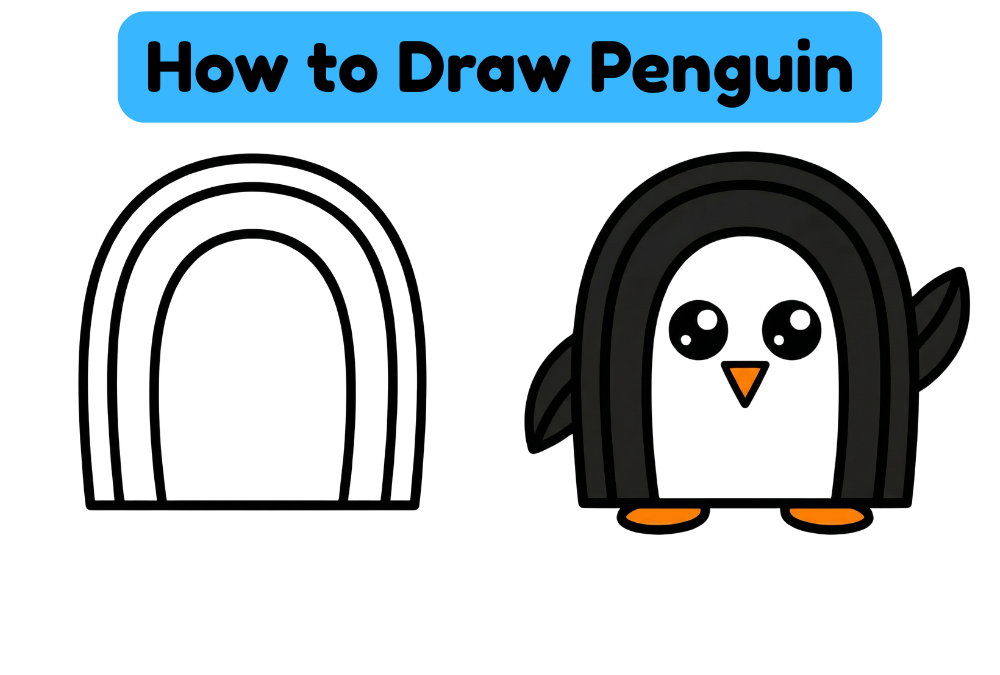
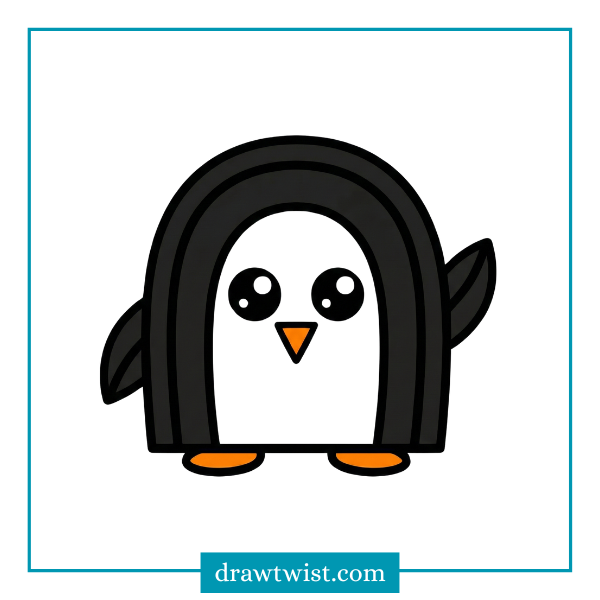
Tutorial 1: The Super Simple “Potato” Penguin
This is the perfect starting point for our youngest artists. We call this the “Potato Penguin” because the main shape looks just like a big potato.
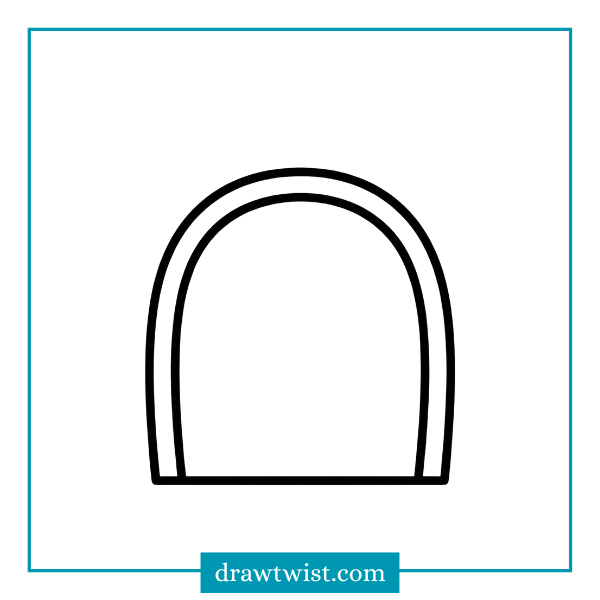
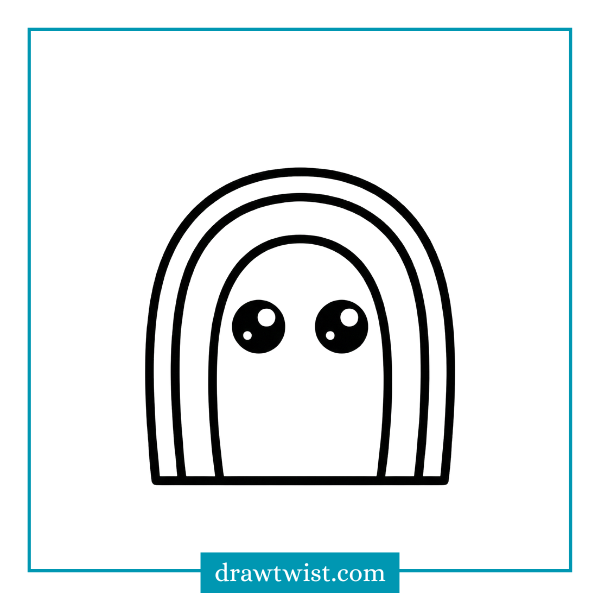
Step 1: The Body
Start in the middle of your paper. Draw a large shape that looks like an upside-down letter “U”. Or, just think of a big archway.
- Tip: Make sure you leave room at the bottom for the feet.

Step 2: Close the Shape
Draw a straight line connecting the bottom of your upside-down “U”. Now you have a shape that looks like a tombstone or a very round door. This is the whole body of the penguin.
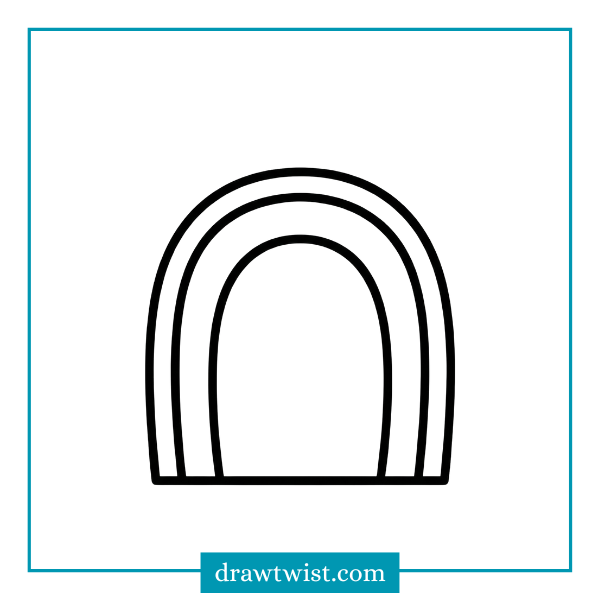
Step 3: The White Tummy
Penguins are famous for their “tuxedos” black backs and white bellies. We need to draw the line that separates the black from the white. Inside your main shape, draw a smaller upside-down “U”. It should look like a rainbow inside the body.
- Coloring Note: Later, the space between the two lines will be black, and the inside will stay white.
Step 4: The Eyes
In the white space (near the top), draw two black dots. These are the eyes.
- Cute Tip: If you want a really cute penguin, make the eyes bigger and leave a tiny white speck inside each black dot. This is called a “catchlight” and makes the penguin look sparkling and alive.
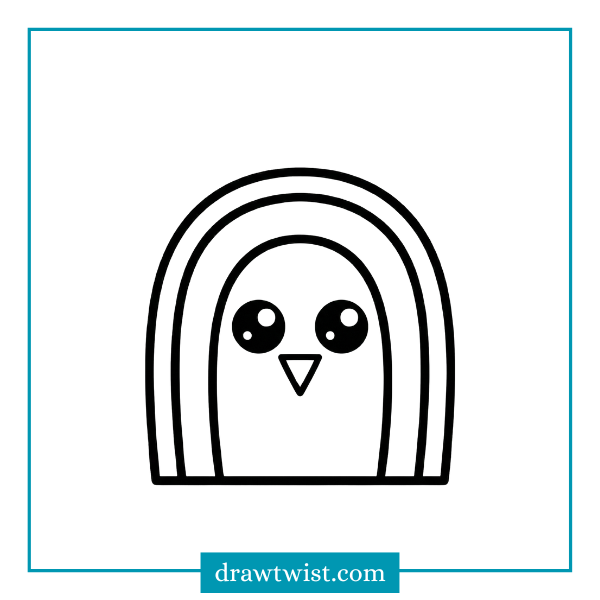
Step 5: The Beak
Between the eyes, but slightly lower, draw a small upside-down triangle.
- Triangle pointing down = Beak.
- Color this orange later.
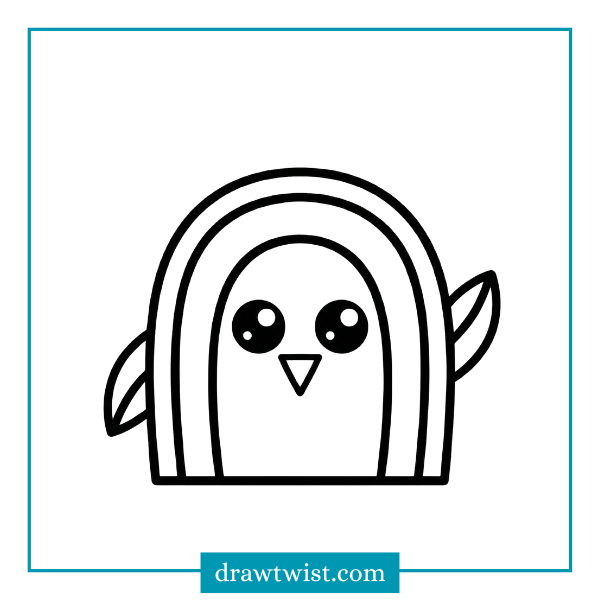
Step 6: The Flippers (Wings)
Penguins have wings, but they can’t fly in the sky. They use them to “fly” underwater. We call these flippers.
- On the left side of the body, draw a leaf shape sticking out.
- On the right side, draw another leaf shape sticking out.
- They can be pointing down (resting) or pointing up (waving “Hello”).
Step 7: The Feet
At the very bottom of the body, draw two ovals sticking out sideways.
- To make them look like webbed feet, you can draw three little bumps on the toes, but simple ovals work great too.
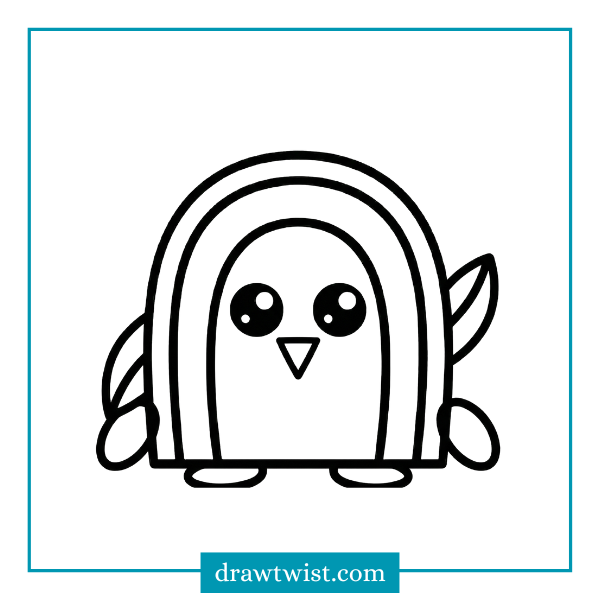
8. Color
Its time to color your cute penguin.
Penguin Fun Fact
Before we move to the next level, let’s learn some cool trivia to tell your friends.
Fact: Do penguins freeze their feet? You might wonder how penguins stand on ice all day without wearing boots. Well, penguins have a special “superpower” in their blood circulation. The warm blood coming from their heart heats up the cold blood coming from their feet before it goes back into their body. It works like a heat exchanger. Also, they can lean back and balance on their heels so their toes don’t touch the ice as much.
Fact: A Group of Penguins. If a group of penguins is in the water, it is called a “raft.” But if that same group walks onto the land, they are called a “waddle.” (That is the most perfect name ever, isn’t it?)
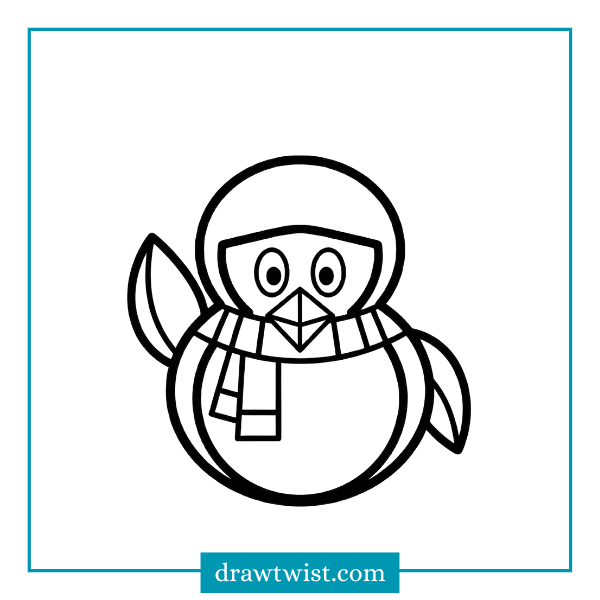
Tutorial 2: The Classic Cartoon Penguin
Now that you’ve mastered the Potato Penguin, let’s try something a little more advanced. This style looks like the penguins you see in movies like Madagascar or Happy Feet. We will use circles to build this one.
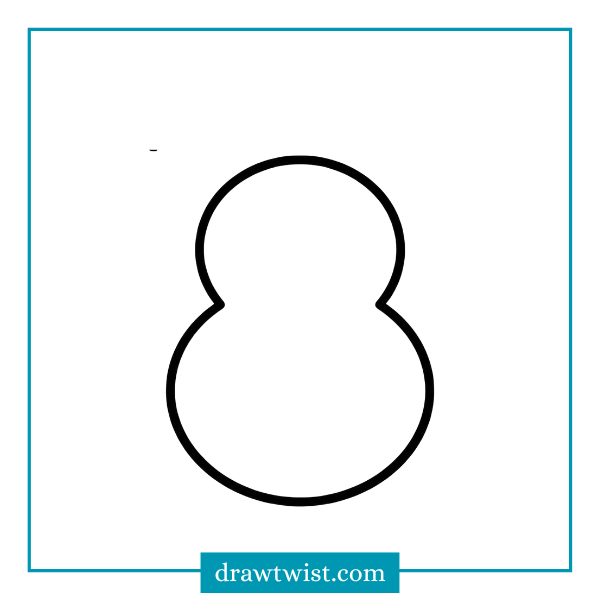
Step 1: The Snowman Shape
Imagine you are building a snowman, but with only two snowballs.
- Draw a medium circle near the top of your paper (this is the head).
- Draw a larger oval underneath it, slightly overlapping the head (this is the body).
- Important: Erase the line where the head and body overlap so it looks like one smooth shape.
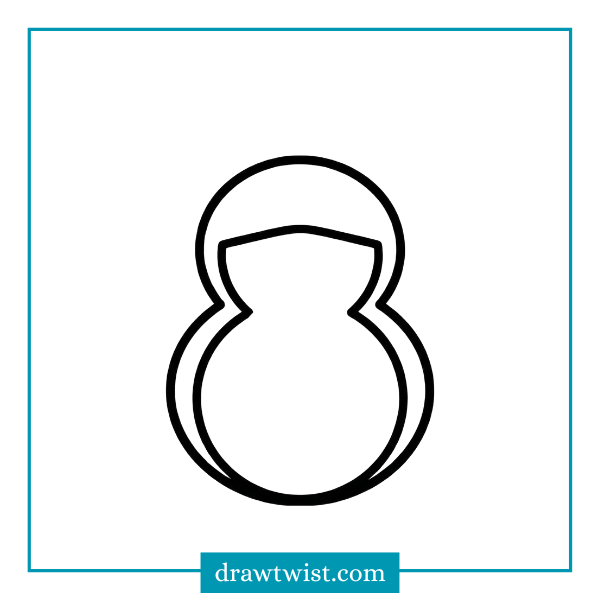
Step 2: The Face Mask
Cartoon penguins usually have a specific white pattern on their face.
- Start at the top of the forehead. Draw a line that curves down around the left eye, comes back to the middle (where the beak will be), and then curves around the right eye.
- It should look like the top of a heart.
- Connect this “heart top” to the big white belly circle on the body.
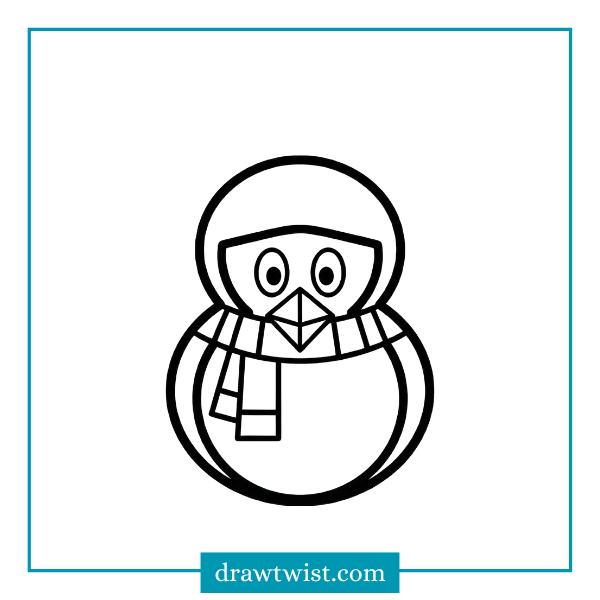
Step 3: Beak and Eyes
- Eyes: Draw two ovals close together inside the white face area. Give them pupils (the black dots).
- Beak: Instead of a simple triangle, let’s make it 3D. Draw a small diamond shape, or a triangle with a line through the middle. This makes it look like the beak is slightly open.

Step 4: The Scarf (Winter Accessory)
Let’s dress him up.
- Right where the neck would be (between the head and body), draw a long, thin rectangle going across.
- Add two shorter rectangles hanging down from one side.
- Draw stripes on the scarf. This is a great chance to use bright colors like Red and Green later.
Step 5: Dynamic Flippers
Let’s make this penguin look active.
- Draw the left flipper pointing up to the sky. (Curve it slightly so it doesn’t look like a stiff board).
- Draw the right flipper pointing down.
- Action: It looks like he is sliding or dancing.
Step 6: The Feet
Draw two triangles at the bottom.
- Pro Tip: To make them look realistic, draw three triangles connected together for each foot. This mimics the webbed toes.
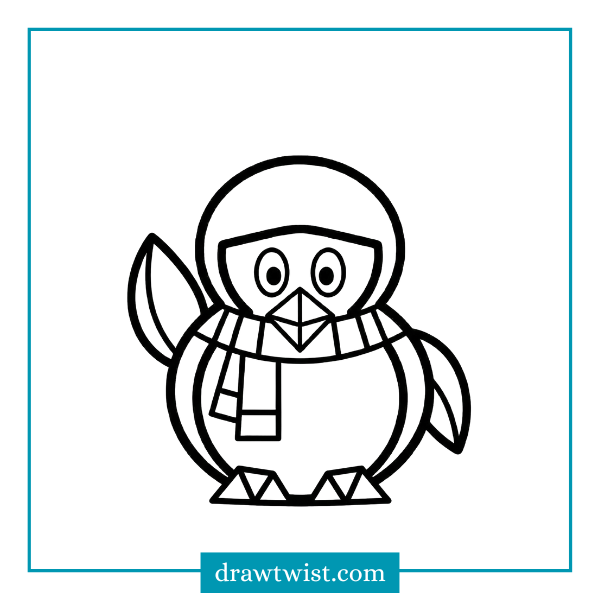
Step 7: The Tail
People often forget that penguins have tails. Their tails are short, stiff, and help them steer.
- Draw a small triangular point sticking out from behind the penguin, right between the feet. It might be hard to see if the penguin is facing you directly, but adding a little point at the bottom helps balance the drawing.

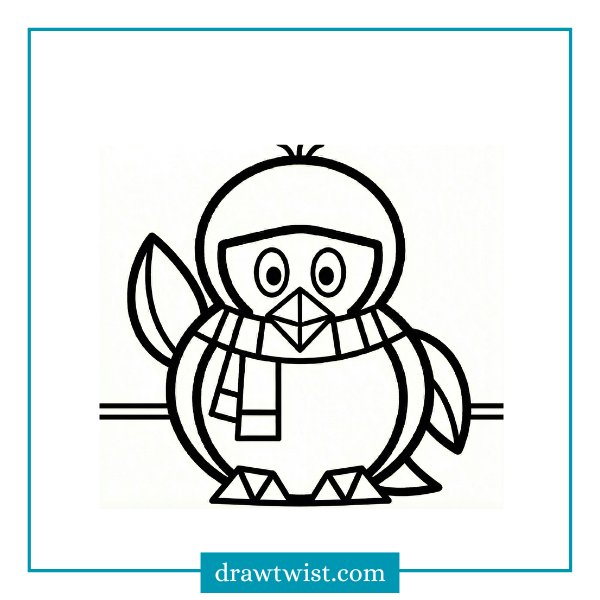
Step 8: The Finishing Touches
- Add three little hairs sticking up from the top of the head.
- Draw a horizon line behind the penguin so he isn’t floating in space.
Troubleshooting: Oops! My Penguin Looks Funny
Every artist gets frustrated sometimes. If your penguin looks a bit weird, don’t crumple the paper. Here is how to fix common penguin problems.
Problem 1: “My penguin looks like a bowing pin.”
- The Fix: You probably made the neck too thin. Penguins have very thick necks (actually, it looks like they have no neck at all). Try thickening the connection between the head and body.
Problem 2: “The beak looks like a chicken beak.”
- The Fix: Chicken beaks are sharp and cone-shaped. Penguin beaks are longer and slightly curved at the tip. Try making the beak a bit longer and flatter.
Problem 3: “It looks flat.”
- The Fix: You need shading. If the light is coming from the sun above, the bottom of the penguin’s belly should be a little grey, not bright white. Add a little shadow under the chin (scarf) and under the flippers.
Problem 4: “The eyes look scary.”
- The Fix: Eyes that are just empty circles can look like “zombie eyes.” Make sure you color in the pupil (the black part) and leave that tiny white reflection spot we talked about. It makes a huge difference.
Penguin Fun Fact
Fact: Why are they black and white? It’s not just to look fancy for a party. It is a special camouflage called Countershading.
- When a penguin is swimming and a predator (like a seal) looks down at them, the penguin’s black back blends in with the dark ocean depths.
- When a predator looks up at them from below, the penguin’s white belly blends in with the bright sunlight hitting the water’s surface.
It is an invisibility cloak.
Fact: The Emperor Daddy. In Emperor penguin families, the mom lays the egg and then leaves to go fishing for two months. The dad stays behind. He balances the egg on his feet and covers it with a warm fold of skin (a “brood pouch”). He stands there in the freezing cold, without eating, waiting for the baby to hatch. Best dad award.
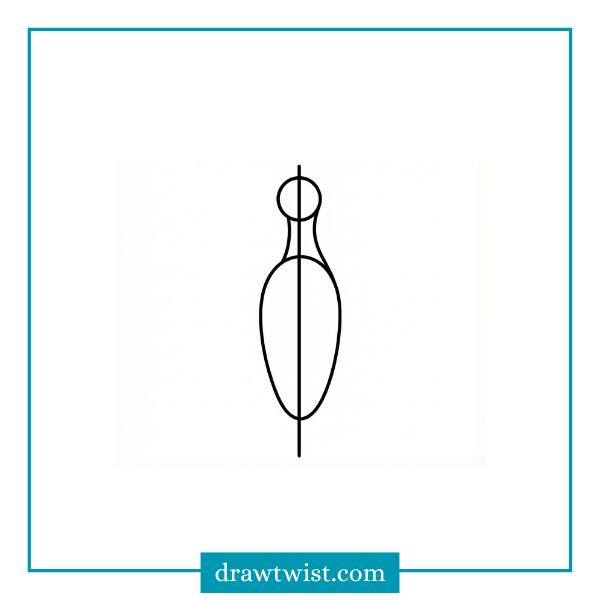
Tutorial 3: The Realistic Emperor Penguin
This project is for older kids or anyone who wants a challenge. We aren’t drawing a cartoon today; we are drawing a majestic Emperor Penguin.
Emperor penguins are tall, regal, and have beautiful yellow/orange markings on their necks.
Step 1: The Guide Lines
Draw these lines very lightly with your pencil because we will erase them later.
- Draw a tall, vertical line down the center of your page. This helps keep the penguin standing straight.
- Draw a small circle at the top (Head).
- Draw a very large, long oval below it (Body). The Emperor penguin has a long, tapered body, like a torpedo.
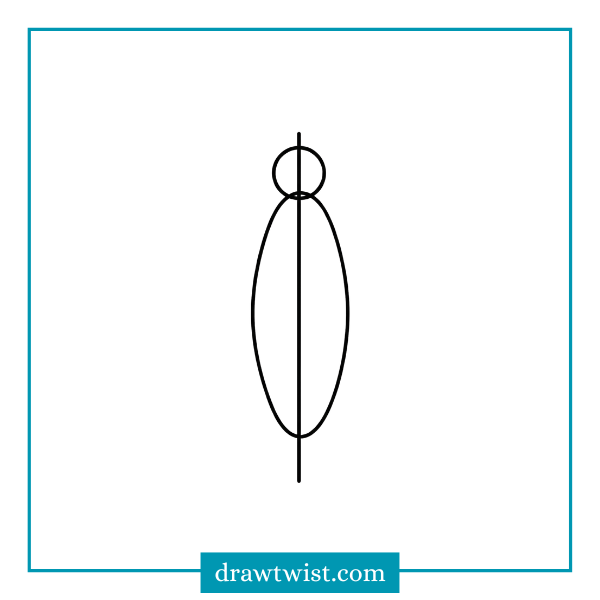
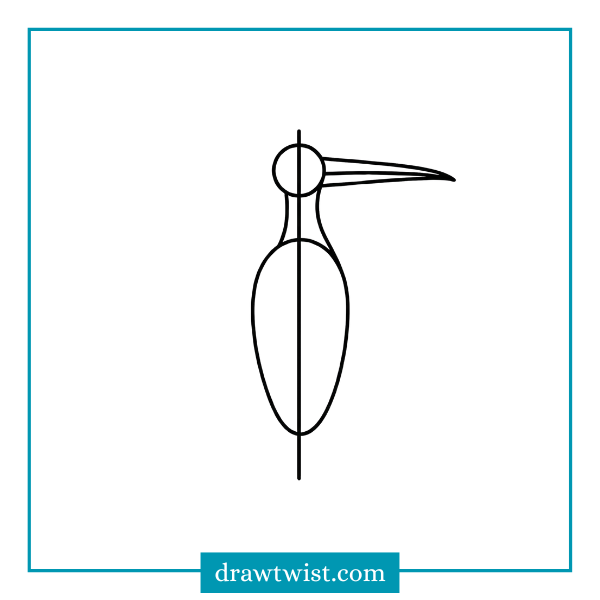
Step 2: Connecting the Neck
Unlike the cartoon penguin, the Emperor penguin has a smooth, sleek neck. Connect the head circle to the body oval with smooth, sloping lines. The back of the neck should curve gently. The front of the neck (throat) should be almost straight vertical.
Step 3: The Beak
Emperor penguins have long, slender beaks.
- Draw a long, thin triangle pointing to the right (or left).
- Curve the top line slightly downward at the tip.
- Draw a line through the middle for the mouth opening. The bottom part of the beak is often orange or pinkish, while the top is black.
Step 4: The Flipper
The flipper on an Emperor penguin is long and powerful.
- Start at the “shoulder” area (just below the neck).
- Draw a long, thin shape that tapers to a point. It should reach almost halfway down the body.
- Emperor flippers are stiff, so use straight lines with slight curves, not wiggly noodles.

Step 5: The Feet and Tail
Emperor penguins have strong legs but they are covered by feathers, so you only see the feet.
- Draw large, sturdy feet with big claws.
- Between the feet, draw the tail resting on the ground. It looks like a stiff broom.

Step 6: The Markings (Crucial Step)
This is what makes it look like an Emperor.
- Draw a line starting from the back of the neck, curving down under the flipper. This separates the black back from the white belly.
- The Ear Patch: Emperor penguins have a famous “tear-drop” shape on the side of their head/neck. Draw a curved line behind the eye that swoops down the neck. Inside this shape, you will color it bright yellow later.
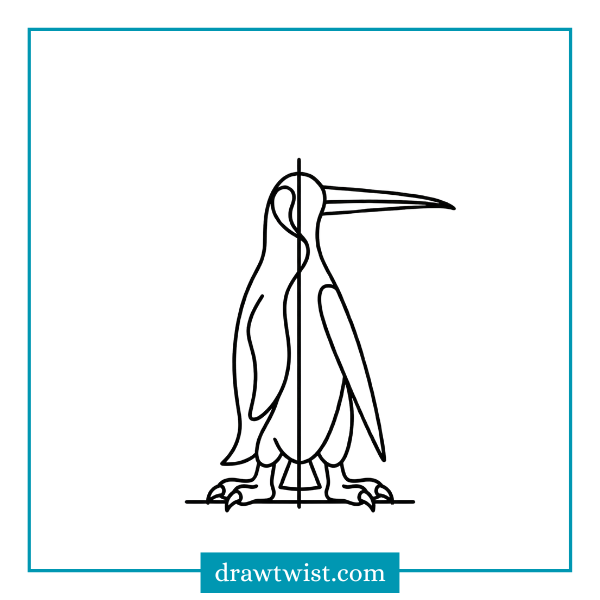
Step 7: Refining the Outline
Go over your pencil lines with a darker stroke. Make the lines look a little “furry” or “feathery” by using short, sketchy strokes instead of one solid line.

Coloring Academy: Textures, Shading, and Ice
You have drawn the lines, but now we need to bring it to life with color.
How to Color Black Feathers (Without Killing Your Marker)
If you just color the whole bird solid black, you lose all the details.
- Technique: Use a dark grey or dark blue first.
- Color the back of the penguin dark grey.
- Then, use your black marker/pencil to add shadows in the darkest areas (under the wing, under the belly).
- This makes the penguin look shiny and smooth, like a seal.
How to Color “White” Snow and Bellies
White paper is boring. Snow and white feathers reflect the colors around them.
- Technique: Take a light blue or light purple crayon.
- Lightly shade the edges of the white belly.
- Lightly shade the ground around the penguin.
- This blue tint makes the white look freezing cold.
The “Wax Resist” Magic Trick
This is a fun art project for kids.
- Draw your penguin on thick paper.
- Color the penguin heavily with crayons (press hard.). Make sure to color the white belly with a white crayon.
- Paint over the whole paper with watery blue watercolor paint.
- The Magic: The paint will soak into the paper for the sky/ocean, but it will “run away” from the waxy crayon penguin. Your penguin will pop out perfectly.
Setting the Scene: Backgrounds and Props
A penguin standing in white space is lonely. Let’s give him a home.
Background Idea 1: The Iceberg
- Draw a jagged horizontal line behind the penguin.
- Draw big, blocky shapes floating in the water.
- Color the water dark blue and the icebergs white with blue shadows.
Background Idea 2: The Northern Lights (Aurora Australis)
- Wait, isn’t it the Southern Lights? Yes, Penguins live in the South.
- Color the sky black or dark blue.
- Use green, pink, and purple chalk pastels or crayons to make wavy ribbons in the sky. Smudge them with your finger to make them look glowing.
Props to Draw
- A Fish: Draw a silvery fish in the penguin’s beak or jumping out of the water.
- A Baby Chick: Draw a tiny, grey, fuzzy oval next to the dad’s feet. Baby emperors are grey, not black and white.
- A Red Hat: Nothing is cuter than a penguin in a beanie.
Craft Corner: Fun Things to Do With Your Drawing
Don’t just put your drawing in a drawer. Let’s use it.
1. The Flapping Penguin Puppet
- Draw your penguin on stiff cardstock paper.
- Do not draw the flippers on the body. Instead, draw the flippers separately on the side of the paper and cut them out.
- Cut out the penguin body.
- Use a “brass fastener” (split pin) to attach the flippers to the body. Now you can move the wings up and down.
- Glue a popsicle stick to the back, and you have a puppet.
2. The Cotton Ball Chick
- Draw a baby penguin outline.
- Instead of coloring the body grey, glue cotton balls all over it.
- Paint the cotton balls light grey (or leave them white).
- It adds a fun 3D fuzzy texture.
3. Penguin Bookmarks
- Draw a tall, skinny penguin.
- Cut it out carefully.
- Laminate it (or cover it in clear packing tape) to make it strong.
- Punch a hole in the top and tie a red ribbon. Perfect for marking your place in your favorite storybook.
Great job, arctic explorers. You have learned how to turn simple ovals and triangles into adorable, waddling penguins.
Drawing is a skill, just like riding a bike or playing video games. The more you practice, the better you get. Maybe today you drew a “Potato Penguin,” but if you keep practicing, in a few years you might be drawing realistic wildlife art for National Geographic.
Here is your mission for this week: Draw a whole family of penguins. Draw a big dad, a mom, and three tiny chicks. Give them all different colored scarves. Maybe one is wearing sunglasses. Use your imagination art has no rules.
Stay cool, and keep creating.
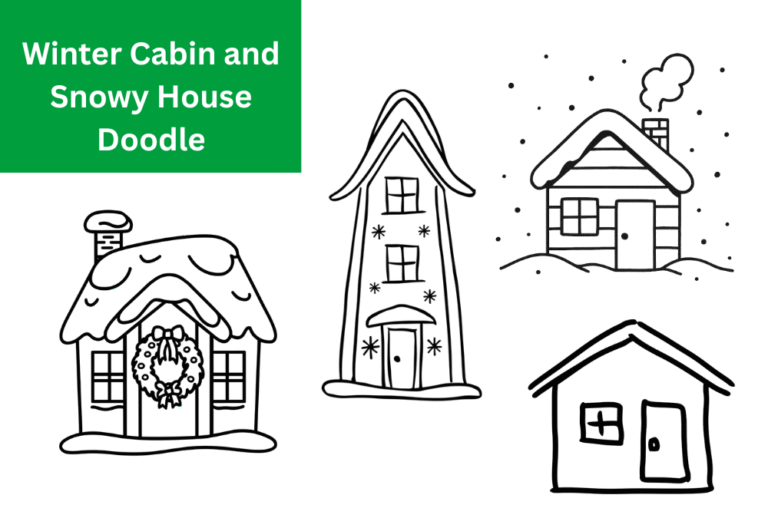
Read More: Simple Penguin Doodle, How to Draw Winter Hat and Mittens, Cozy Winter Doodles