
How to Draw Christmas Lights (Easy Step-by-Step Guide For Everyone)
Christmas lights are one of the most recognizable symbols of the holiday season. Their colorful glow makes homes feel warm and festive, and artists love incorporating them into illustrations. Whether you want to decorate holiday cards, illustrate cozy scenes, or simply bring some winter cheer into your sketchbook, drawing Christmas lights is an essential artistic skill.
The beauty of Christmas lights is that they can be as simple or as detailed as you want. A child can draw them with basic shapes. A professional illustrator can create photorealistic glowing effects. You can incorporate them into nearly any holiday drawing: Christmas trees, pets, snowmen, lettering, landscapes, or cozy interiors.
This guide teaches beginners, intermediate artists, and even experienced creators how to draw beautiful Christmas lights, step by step.
Method 1: How to Draw Christmas Lights
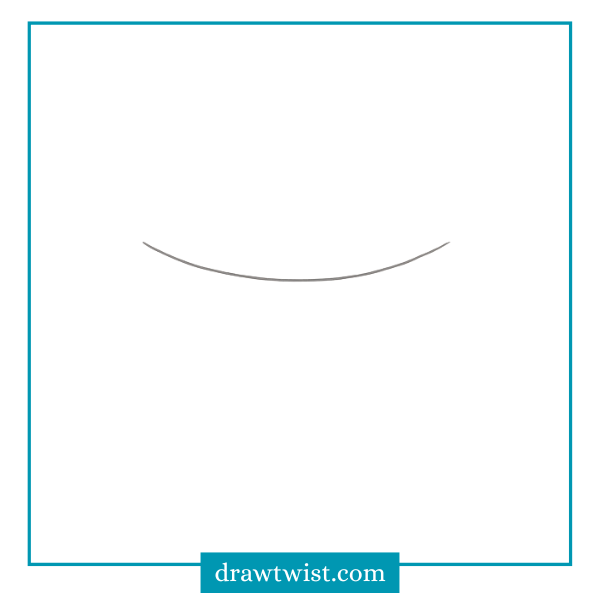
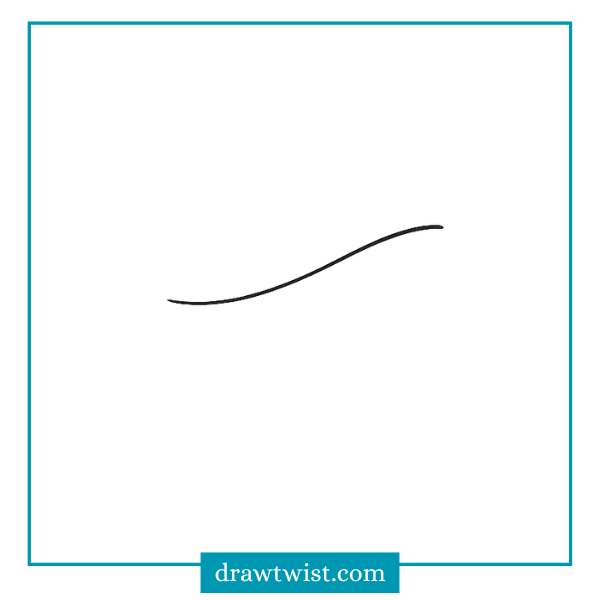
STEP 1: Draw the Guideline String
In this first step, begin by drawing a gently curved line across your page. This curved line acts as the main string that your Christmas lights will hang from. Christmas lights rarely hang perfectly straight, so giving the line a natural curve helps your drawing look more realistic and festive.
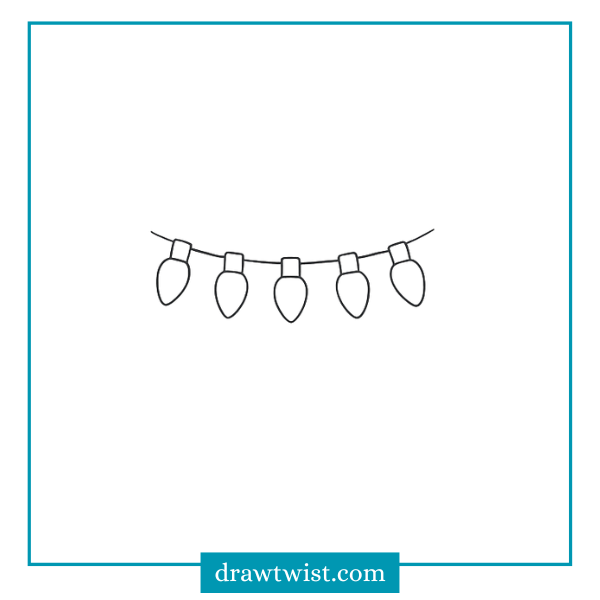
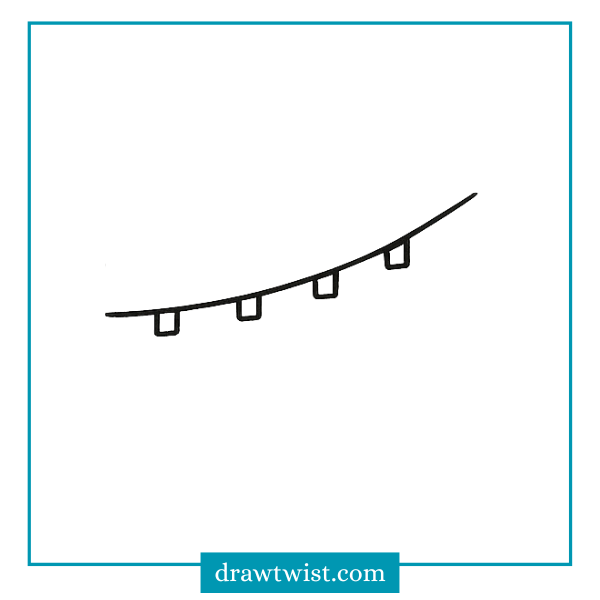
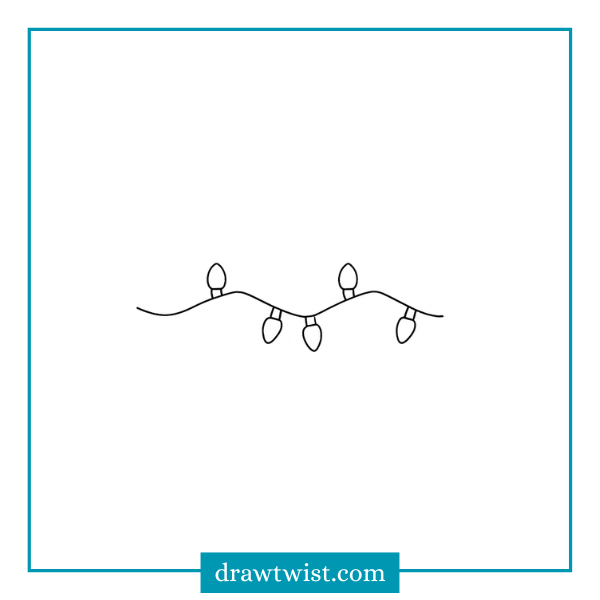
STEP 2: Add the Bulb Bases and Bulbs
In this step, start adding the main shapes that form your Christmas lights. Along the curved guideline you drew in Step 1, draw small rectangular bases evenly spaced across the string. These little rectangles act as the bulb holders.
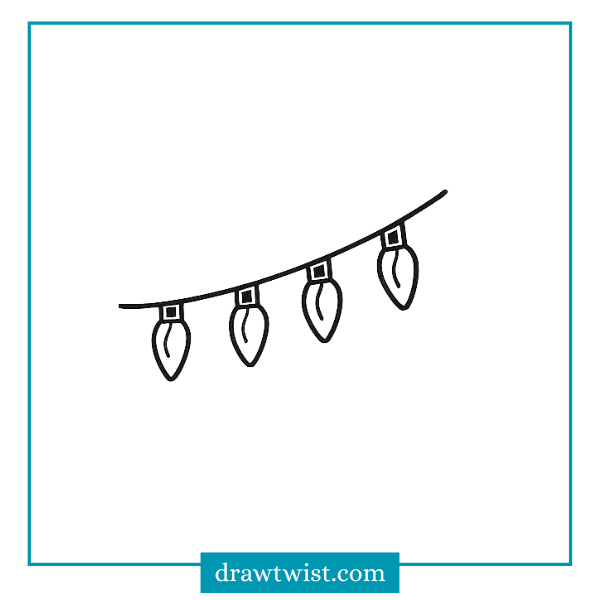
Next, attach a teardrop-shaped bulb under each base. You can make the bulbs slightly rounded or more pointed at the bottom both styles work well. Be sure to keep the bulbs roughly the same size so the lights look neat and balanced.
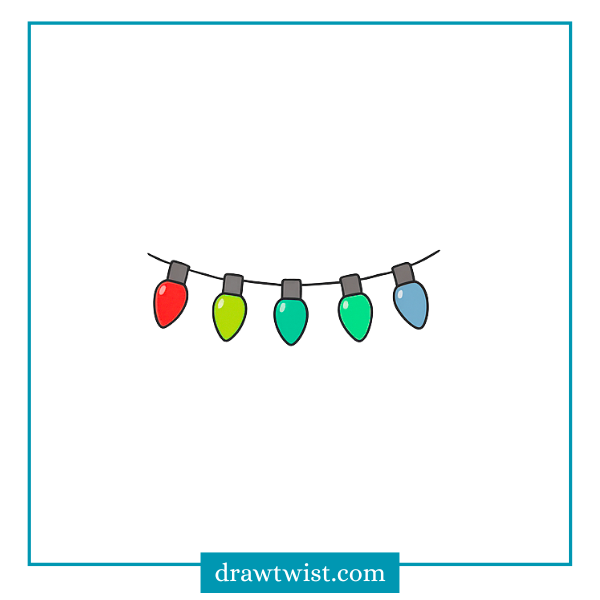
STEP 3: Add Color to the Bulbs
Now it’s time to bring your Christmas lights to life by adding bright, festive colors to each bulb. You can choose traditional Christmas colors like red, green, blue, and yellow, or get creative with any shades you love.
Color each bulb evenly, and don’t forget to leave a small white spot to represent a shiny highlight this makes the bulbs look glossy and more realistic. You can also vary the colors to create a fun, multicolored light strand.
Method 2: Classic Christmas Lights
STEP 1: Draw the Guideline String
Start by drawing a smooth, slightly curved line across your page. This line will act as the main string where your Christmas lights will hang. Christmas lights rarely stay perfectly straight, so adding a gentle wave or curve makes them look more natural and festive.
STEP 2: Add the Bulb Bases
Along the curved string you drew in Step 1, start adding small rectangular bases spaced evenly apart. These bases act as the holders where each Christmas light bulb will connect to the wire.
Make sure the rectangles line up with the curve of the string, and try to keep them close in size so the lights look neat and balanced. These simple shapes set the structure for your bulbs, which you’ll draw in the next step.
STEP 3: Draw the Light Bulbs
Now it’s time to add the classic Christmas light bulbs. Under each rectangular base, draw a teardrop-shaped bulb. These bulbs should be slightly rounded at the top and pointed at the bottom, giving them that traditional holiday light appearance.
Make sure each bulb is centered beneath its base and follows the curve of the string. Keeping the shapes similar in size helps the final design look balanced and neat.

STEP 4: Add the Wire Details
Now that your bulbs are in place, it’s time to add the small details that connect everything together. Draw a short vertical line between each rectangular base and the bulb. This tiny detail represents the connector that attaches the bulb to the socket.
These little lines help your Christmas lights look more complete and realistic. Make sure each connector is centered and straight so your design stays neat and balanced.

STEP 5: Add Details Inside the Bulbs
To make your Christmas lights look more realistic and decorative, add a small curved line inside each bulb. These inner lines represent the glass shine or the reflective detail found in classic Christmas bulbs.
Keep each line curved and centered, following the shape of the bulb. This simple detail adds depth and makes the bulbs look more three-dimensional, even before adding color.
STEP 6: Add Color to the Bulbs
Now it’s time to bring your Christmas lights to life by adding bright, cheerful colors! Choose classic holiday shades like yellow, red, green, and blue, or mix in any colors you love. Fill each bulb evenly, making sure to keep the highlight area lighter to maintain a shiny, glass-like effect.
You can add a darker shade around the edges of each bulb to create depth and make them appear more 3D. This final step adds warmth, vibrancy, and the magical holiday feel to your drawing your classic Christmas lights are complete.

Method 3: Zigzag Christmas Lights
STEP 1: Draw the Zigzag Guideline
Begin by drawing a wavy zigzag line across the center of your page. This line will act as the main string that your Christmas lights will hang from.

STEP 2: Add the Light Bulbs
Now start adding the Christmas light bulbs to your zigzag string. Place bulbs at the top points and bottom dips of the wavy line this creates a fun, decorative pattern and makes the lights look like they’re hanging naturally.
Draw each bulb using a teardrop shape with a rectangular base at the top. Make sure the bulbs follow the flow of the zigzag line and stay evenly spaced so the design looks neat and balanced.
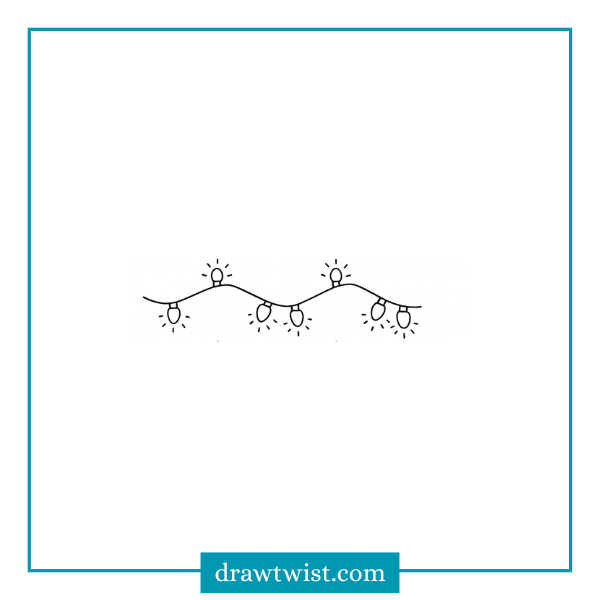
STEP 3: Add Light Rays for a Glowing Effect
To make your Christmas lights look bright and full of life, add small light ray lines around each bulb. Draw short, straight lines radiating outward from the bulbs some at the top, sides, and bottom. These tiny marks create the illusion that the bulbs are shining.
Keep the rays evenly spaced and similar in length so the glow looks neat and consistent. This simple detail instantly enhances the festive feel of your zigzag light strand.
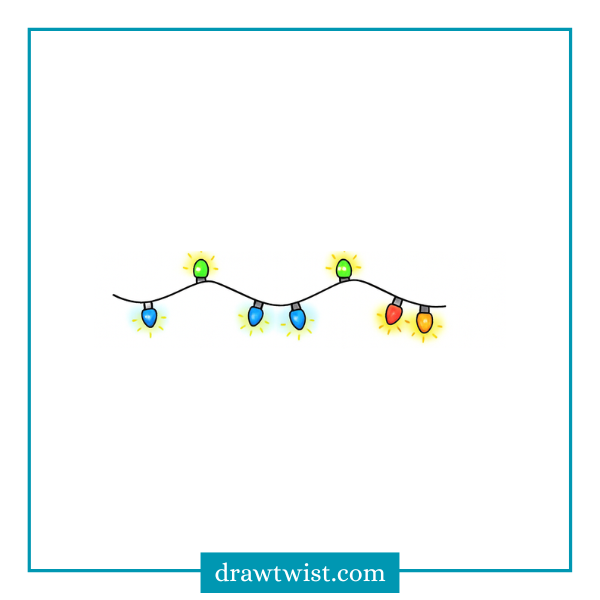
STEP 4: Add Color and Glow to Complete the Lights
Color each bulb using bright, cheerful shades like green, blue, red, and yellow. Try to keep the tops slightly lighter to create a natural shiny highlight.
Next, add a soft glow around each bulb. You can do this by lightly shading the area around the bulb with the same color, then blending outward to create a warm, glowing effect. This makes the lights look like they’re truly shining. The combination of bold color and glowing halos gives your zigzag light strand a magical holiday feel.
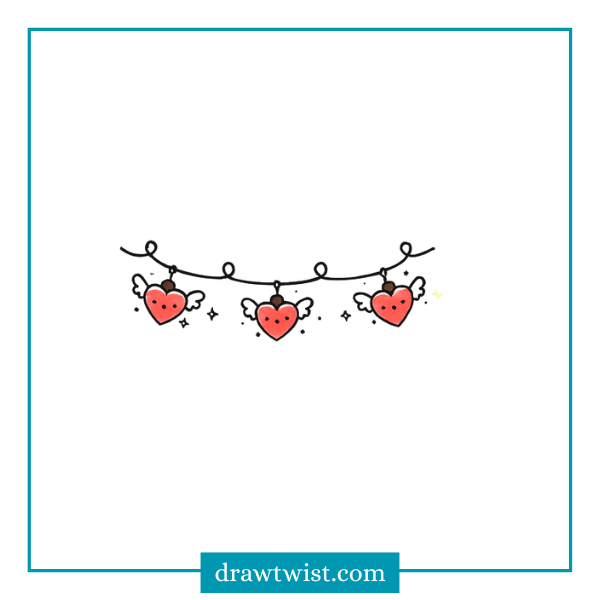
Method 4: Heart-Shaped Christmas Lights
STEP 1: Draw the Guideline String
Start by drawing a smooth, curved line across your page. This line will act as the main string where your heart-shaped Christmas lights will hang.

STEP 2: Add Hanging Loops for Each Light
Along the curved guideline string, draw small loop shapes one for each heart light you plan to add. These loops act like tiny hooks or connectors that will hold the decorative heart bulbs.

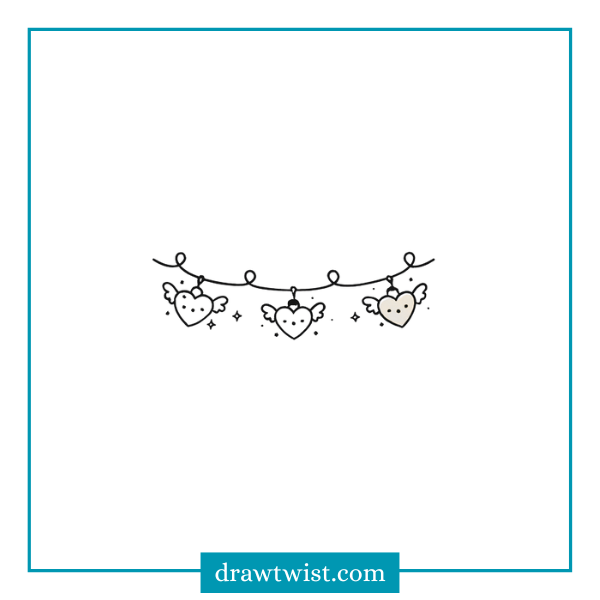
STEP 3: Draw the Heart-Shaped Bulbs with Wings
Now it’s time to add the main decorative bulbs. Under each hanging loop, draw a heart shape to create the light bulbs. Make the hearts slightly rounded and symmetrical for the cutest look. Next, add small angel-style wings on each side of the hearts.
These wings give your Christmas lights a magical, whimsical feel and make the design extra charming. Make sure each heart hangs straight down from its loop to keep the light strand looking tidy. Once all the hearts and wings are drawn, you’re ready for the final step adding color and sparkle.

STEP 4: Add Color and Sparkly Details
Fill each heart with a soft, warm color like blush pink, cream, or pastel tones. You can even mix different shades to make each heart unique. Keep the centers slightly lighter to create a gentle highlight.
Next, add small sparkles, stars, and tiny dots around the hearts to enhance the magical, glowing effect. These little details give the design a dreamy holiday vibe and make the lights look like they’re twinkling.
STEP 5: Add Final Color, Outlines, and Shine
For the final touch, deepen the colors of your heart bulbs to make them stand out even more. Add a brighter shade inside each heart for highlights, and use a slightly darker tone around the edges to give them a soft, glowing look.
You can also thicken the outlines slightly to make the designs pop and add tiny white shine dots on the hearts and wings for extra cuteness. Keep the sparkles around the hearts they help emphasize the magical, twinkling effect.
Why Learning to Draw Christmas Lights Is a Great Skill
Here’s why drawing Christmas lights is not just festive fun, it’s creatively useful:
1. They instantly add a holiday vibe
Even a simple string of lights can transform your illustration from everyday to festive.
2. They’re incredibly versatile
Use them for:
- Christmas cards
- Blog illustrations
- Holiday planners
- Clipart
- Coloring pages
- Branding
- Posters and flyers
- Stickers
- Social media graphics
3. They’re beginner-friendly
Christmas lights are based on simple shapes: circles, ovals, rectangles, and curved lines.
4. They help you practice glow effects
Glow, reflection, and lighting are essential art skills — Christmas lights are the perfect place to practice.
5. They enhance storytelling
A cozy winter illustration feels instantly alive when warm glowing lights are added.
6. They’re relaxing to draw
Many people find drawing Christmas lights calming and joyful.
Types of Christmas Lights You Can Draw
Christmas lights come in many shapes and styles, and each offers unique artistic possibilities. Understanding the types helps you choose what to draw.
Classic C9 Bulbs
- Teardrop shape
- Large and colorful
- Retro vintage vibe
Mini String Lights
- Small oval bulbs
- Often used on Christmas trees
- Easy and quick to draw
LED Twinkle Lights
- Very small round bulbs
- Bright, modern, and minimalist
Fairy Lights
- Tiny lights on a thin wire
- Perfect for aesthetic illustrations
Icicle Lights
- String lights that hang downward
- Great for house and window drawings
Novelty Shapes
- Stars, snowflakes, candy canes, bells
- Great for whimsical or kids’ art
Each type can be drawn using the same principles, but the shapes and details differ.
Tools & Materials You’ll Need
You can draw Christmas lights with anything pencil, pens, markers, or digital tools. Here’s what helps:
Basic Tools
- Pencil
- Eraser
- Sketchbook
Inking Tools
- Fineliner pen
- Micron pen
- Brush pen (optional)
Coloring Tools
- Colored pencils
- Markers
- Watercolors
- Gel pens
- Digital tablet
Extras
- White gel pen (for glow highlights)
- Ruler (optional for neat lines)
- Reference images
Digital artists can use:
- Procreate
- Photoshop
- Clip Studio Paint
- Medibang
- Illustrator
Understanding the Anatomy of a Christmas Light
Before drawing, let’s look at the basic structure of a traditional Christmas bulb.
1. The Bulb
The main glowing part usually oval or teardrop-shaped.
2. The Base Socket
A cylindrical shape that connects the bulb to the wire.
3. The Wire
A curved line that strings the lights together.
4. The Glow Halo (optional)
A soft light aura around the bulb.
5. Highlights
Small white spots that make the bulb look shiny.
When you understand these components, drawing Christmas lights becomes easy and intuitive.
How to Draw Christmas Lights in Different Styles
Now let’s explore stylistic variations.
Cartoon Style
- Bold outlines
- Large bulb shapes
- Bright, solid colors
- Simple glow
Perfect for kids’ illustrations and holiday cards.
Minimalist Style
- Thin wire
- Small dots of light
- Soft glow
- Pastel palette
Looks clean and modern great for aesthetic art.
Realistic Style
- Detailed reflections
- Transparent glass
- Accurate light diffusion
- Gradients and shadows
This takes more time but produces stunning art.
Watercolor/Soft Style
- Gentle edges
- Blended colors
- Soft brush strokes
- Delicate glow halos
Ideal for cozy themed illustrations.
Kawaii Style
- Round chubby bulbs
- Cute faces on the bulbs
- Blush spots
- Soft pastel colors
Adorable and trendy for social media.
Vintage Style
- Larger C9 bulbs
- Muted retro colors
- Painted texture
- Slightly uneven bulbs
Great for nostalgic holiday artwork.
How to Create Light Glow Effects (Beginner to Advanced)
Glow effects make Christmas lights look alive.
Beginners
- Add a simple white dot highlight.
Intermediate
- Add a soft halo with colored pencil or digital smudge tool.
Advanced
- Use layered gradients
- Add inner glow + outer glow
- Blend colors carefully
Glow effect tips:
- Keep glow soft, not harsh
- Use lighter tones near the bulb
- Fade outward gradually
How to Draw Christmas Lights Around Objects
Use lights to enhance larger drawings.
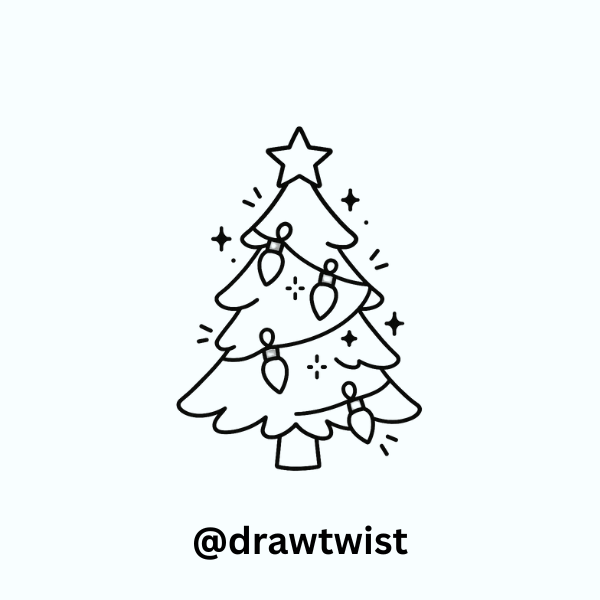
Around a Christmas Tree
- Follow the tree’s triangular shape
- Use spiraling lines
Around a Window or Fireplace
- Follow straight and curved architectural edges
- Add shadows for realism

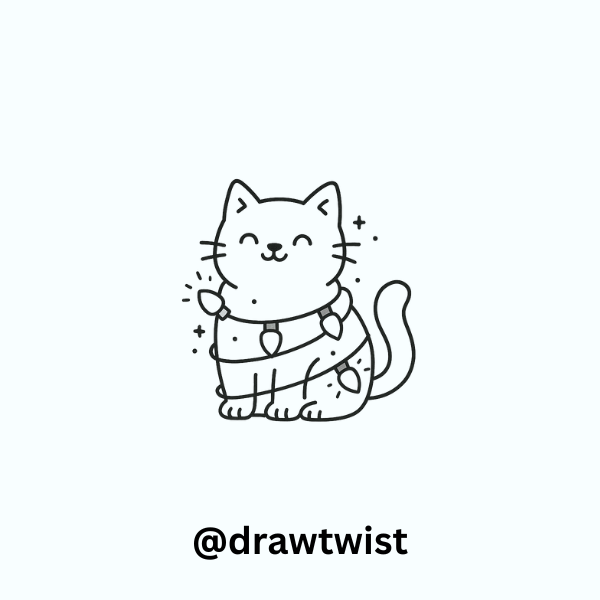
Wrapped Around a Cat
- Add loops that follow body curves
- Keep proportions correct
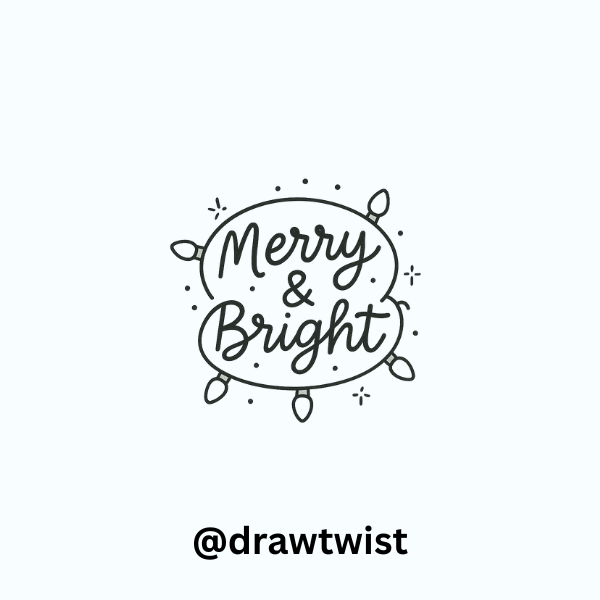
Around Lettering
- Wrap lights around large holiday words
- Great for greeting cards
Around a Wreath
- Follow circular shape
- Add depth by placing lights behind leaves
How to Add Backgrounds
Options include:
- Snowy background
- Night sky
- Indoor room scene
- Christmas tree branches
- Soft bokeh lights
- Winter village
A background makes your artwork feel complete.
Tips for Digital Artists
- Use multiple layers for glow
- Gaussian blur is your friend
- Use screen, add, or overlay blending modes
- Use textured brushes for vintage style
- Save palette swatches for consistent coloring
Tips for Traditional Artists
- Layer colored pencils slowly
- Use a white gel pen for highlights
- Soft pastels help create glow
- Avoid pressing too hard too early
- Blend with a blending stump or tissue
Troubleshooting & Common Mistakes
1. Bulbs all look the same
Add size variation.
2. Glow looks messy
Blend smoother using lighter pressure.
3. Bulbs aren’t symmetrical
Try drawing a center guideline.
4. Colors look flat
Add gradient shading.
5. Lights don’t follow shapes
Practice wrapping lines around objects.
Learning how to draw Christmas lights is one of the most fun and rewarding holiday art skills. Whether you’re creating festive greeting cards, designing blog graphics, decorating your planner, or building a cozy winter illustration, Christmas lights instantly add charm, warmth, and magic.
Read More: How Do You Draw Christmas gift box, Christmas Lights Doodle
![29 Halloween Doodles Anyone Can Draw [Cute & Spooky]](https://drawtwist.com/wp-content/uploads/Halloween-Doodles-768x518.png)