
How to Draw Christmas Dog: Step-by-Step Guide [Beginner Friendly]
Christmas is a season filled with creativity. From decorating trees to crafting handmade ornaments, people love adding a personal touch to their holiday celebrations. Drawing is one of the simplest and most meaningful ways to express creativity during this special season.
A Christmas dog drawing, in particular, evokes instantly recognizable holiday charm. Whether cute and cartoony or detailed and realistic, Christmas dogs reflect the joy and warmth of the season. They can be drawn cuddled in scarves, wearing Santa hats, sitting by the fireplace, unwraping gifts, or even tangled in homemade Christmas lights.
In this guide, you’ll learn to draw a Christmas dog design that’s not only easy to follow, but also customizable. By the end, you’ll be able to create your own holiday dog illustrations in any style you like simple, detailed, or whimsical.
Why Drawing a Christmas Dog Is the Perfect Holiday Art Project
Before diving into the tutorial, let’s explore why sketching a Christmas dog is such a perfect seasonal activity.
1. It’s beginner-friendly
Dog drawings can be broken into simple shapes circles, ovals, and soft lines making them ideal for new artists.
2. Endless customization
You can:
- Change the dog breed
- Choose different expressions
- Add holiday outfits
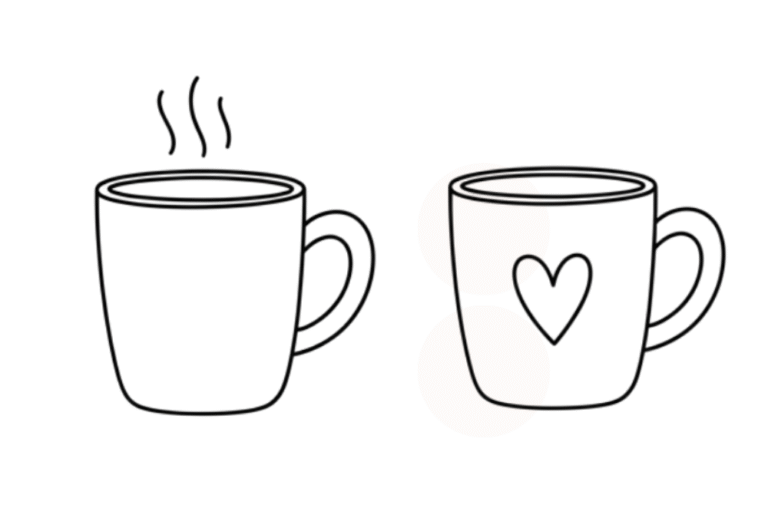
- Include props like gifts, ornaments, snowflakes, mugs of hot cocoa
- Create backgrounds like fireplaces or snowy forests
It’s a flexible project that encourages creativity.
3. They make heartfelt gifts
Your drawing can be turned into:
- Christmas cards
- Printable wall art
- Stickers
- Wrapping paper
- Personalized gifts
People love receiving hand-drawn art during the holidays.
4. Fun for all ages
Kids, teens, adults everyone can enjoy drawing a Christmas dog. It’s a perfect family craft session.
5. Helps reduce holiday stress
Creativity is soothing. Sitting down with a pencil and paper for half an hour is a simple form of self-care during holiday chaos.
Whether you’re drawing for fun, for kids, for décor, or as part of a hobby, a Christmas dog is a festive and heartwarming choice.
Materials You’ll Need
You don’t need expensive tools to draw a Christmas dog anything works. But here’s a list of helpful materials that can make the process smoother.
Basic Supplies
- Blank paper or sketchbook
- Pencil (HB or 2B recommended)
- Eraser
- Black fineliner or liner pen
Coloring Tools (optional but recommended)
- Colored pencils
- Alcohol markers
- Crayons
- Watercolor paints
- Digital drawing tablet (for digital artists)
Optional Extras
- Ruler for background shapes
- White gel pen for highlights
- Reference photos of dogs
- Christmas images (hats, scarves, etc.)
Step-by-Step Christmas Dog Drawing Instructions
Tutorial 1: How to Draw a Christmas Puppy (Easy & Cute)
Style: Simple cartoon, rounded shapes, perfect for beginners/kids.
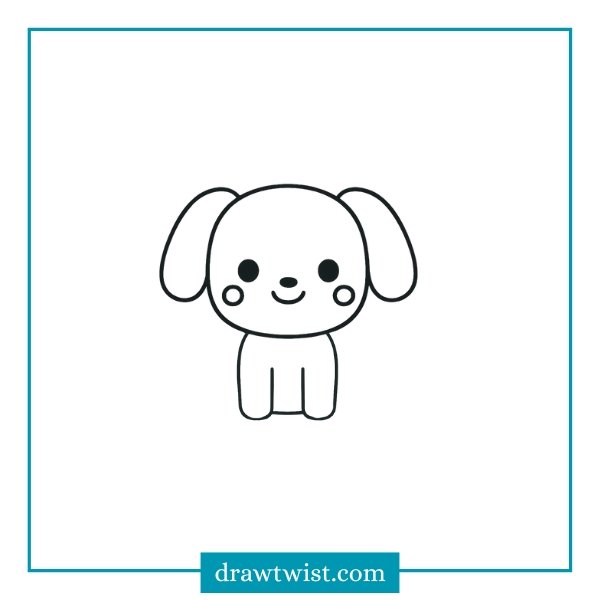
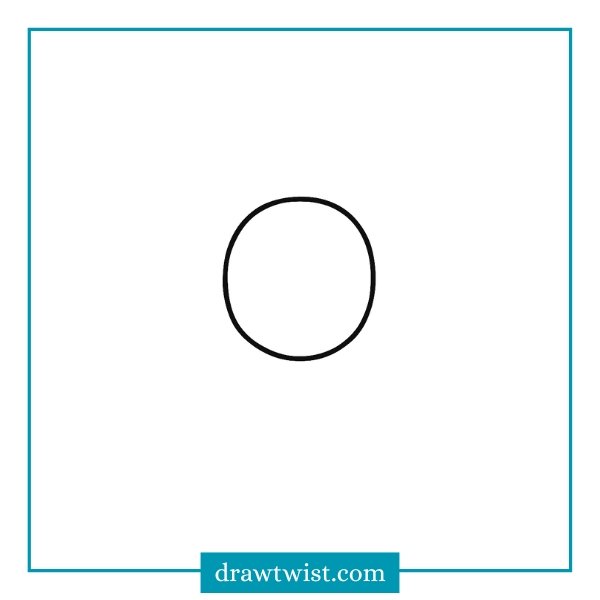
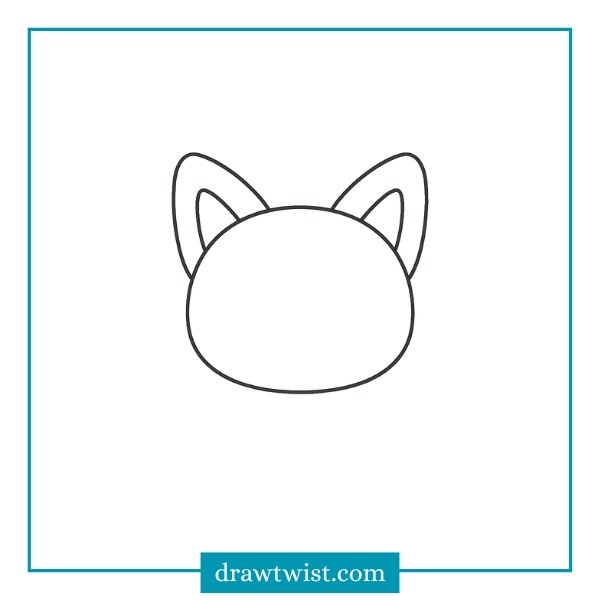
Step 1: Draw the Puppy’s Head
Start by drawing a big circle or a slightly oval shape. This will be the puppy’s head and should be large and round to keep the drawing cute.
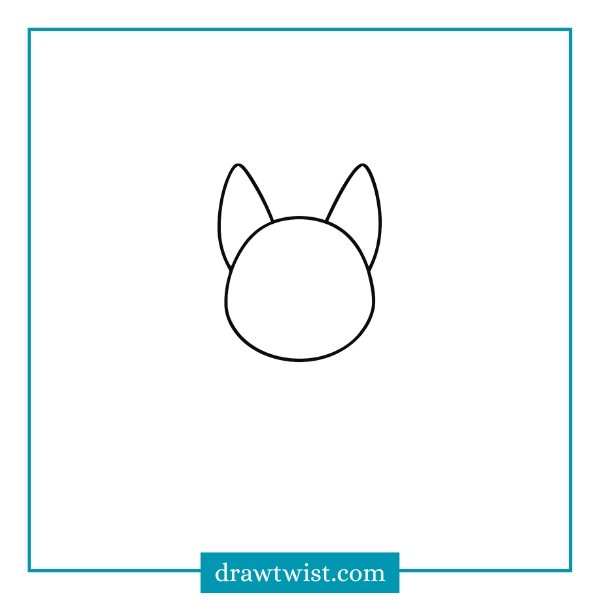
Step 2: Draw the Ears
On both sides of the puppy’s head, draw long floppy ears. Make the ears curved and droopy, using smooth rounded lines so they look soft and cute. You can angle them slightly downward to make the puppy look friendly and adorable.

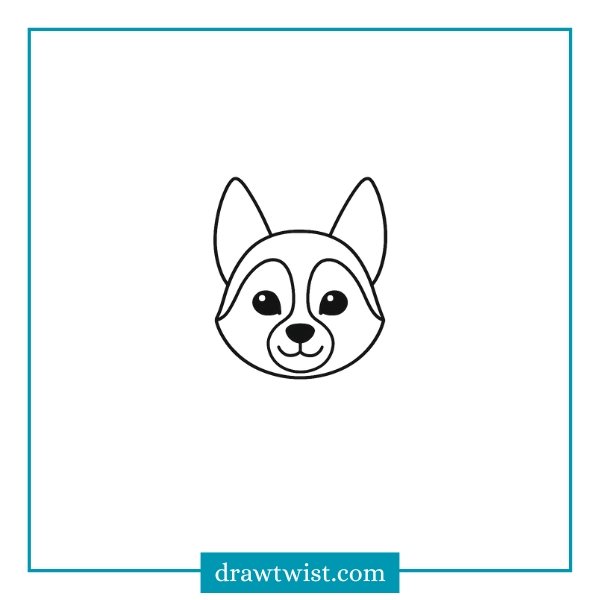
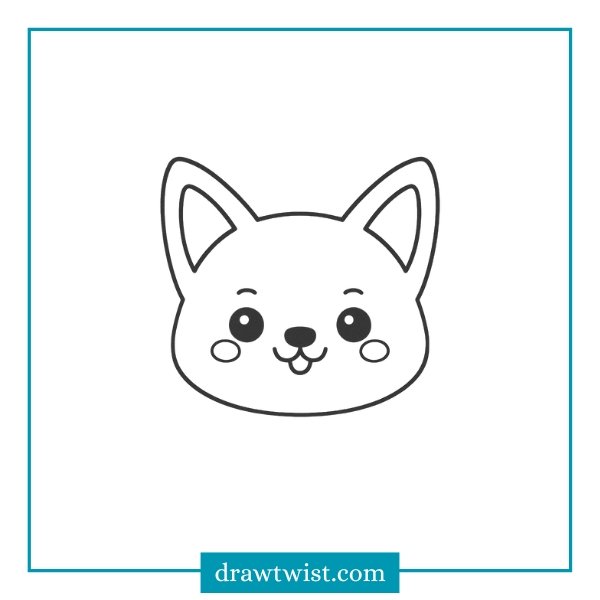
Step 3: Add the Face
Draw two big circle eyes. Add a small oval nose in the middle. Draw a “U” shaped smile. To make the puppy even more adorable, add two tiny oval shapes on the lower sides of the circle these will act as cute chubby cheeks.

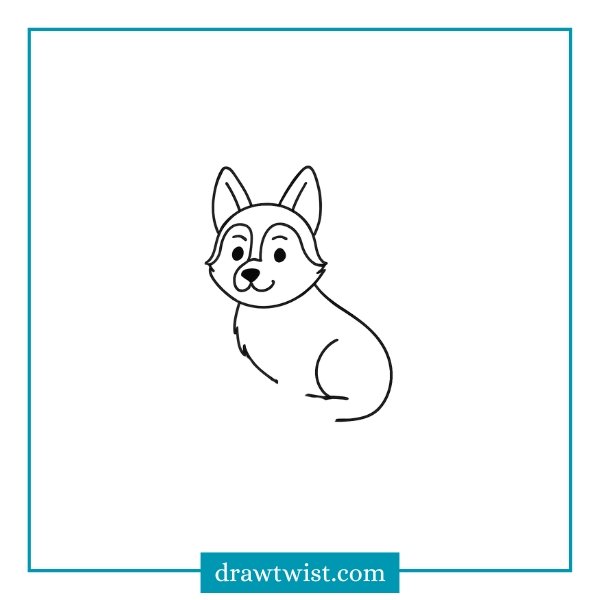
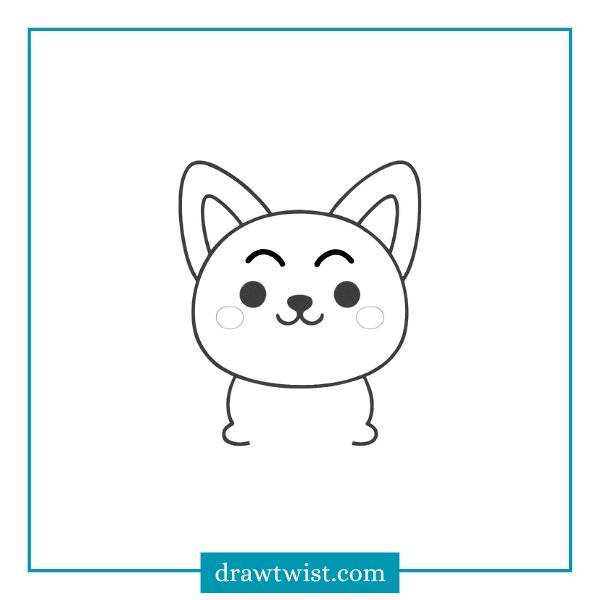
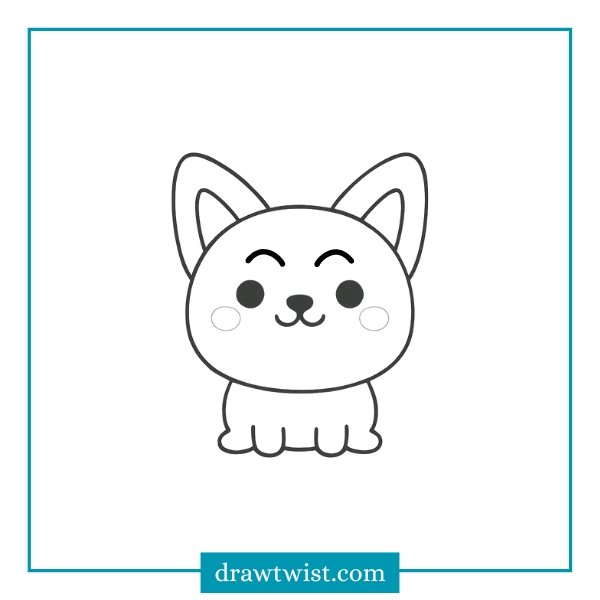
Step 4: Add the Body
Under the puppy’s head, draw a small oval or a rounded rectangle. This will be the puppy’s body. Make the body smaller than the head this helps keep the drawing cute and cartoon like. Keep the bottom slightly flat so the legs can be added easily in the next step.

Step 5: Draw the Legs
Now add the puppy’s front legs. Draw two long rounded rectangles extending down from the bottom of the body.
Make them the same size so the puppy looks balanced. At the bottom of each leg, round the corners slightly this makes the paws look soft and cute. Keep the legs simple and smooth, just like a kid-friendly cartoon style.
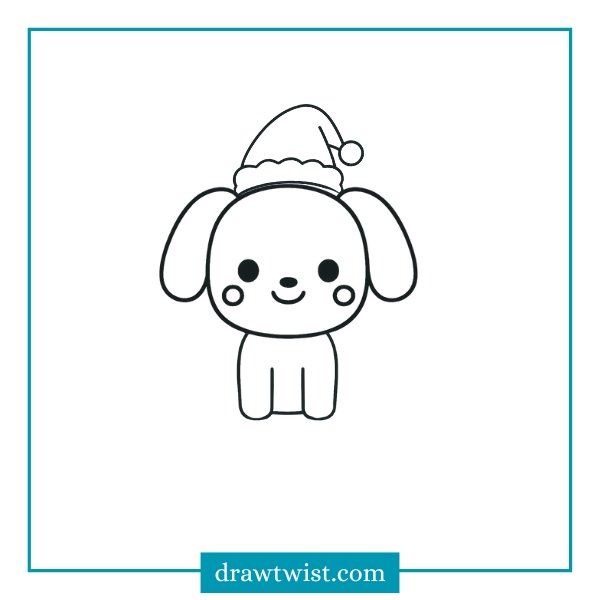
Step 6: Add Christmas Accessories
Draw a Santa hat on the head:
• Fluffy brim
• Pointy hat
• Pom-pom at the end
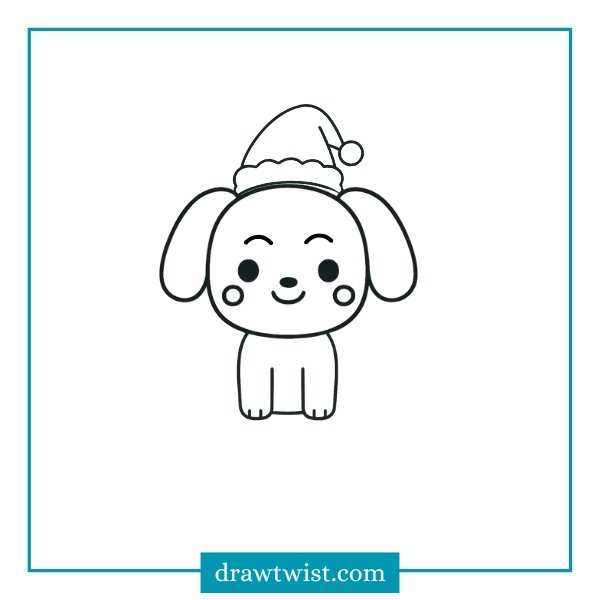
Step 7: Final Outline
Add small details like eyebrows or paw lines.
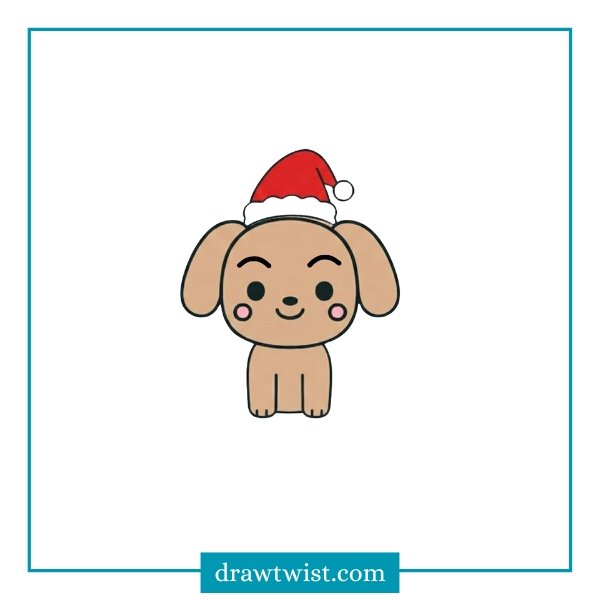
Step 8: Color
Use light brown for fur, red for hat, white for trim, pink cheeks.
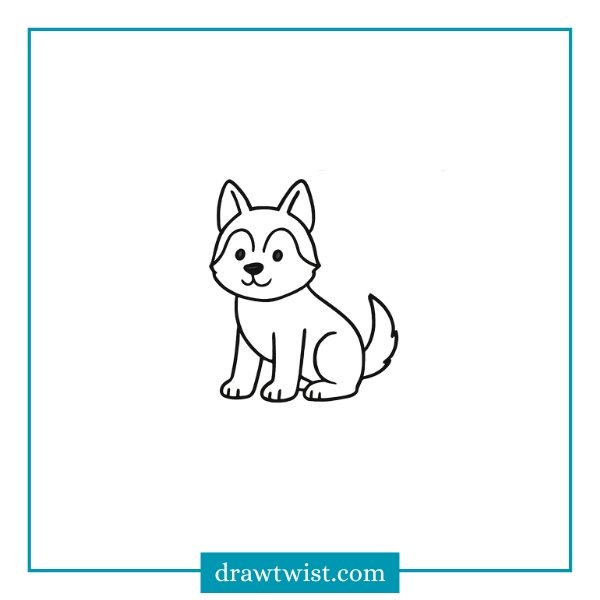
Tutorial 2: How to Draw a Christmas Husky (Festive Scarf Version)
Style: Slightly realistic cartoon, two-tone fur.
Step 1: Draw the Head Shape
Start by sketching an oval shape with a gently pointed bottom. This point creates the husky’s snout. Keep the top wider and the bottom narrower.
Step 2: Add the Ears
Draw two large, upright triangle-shaped ears on top of the head. Husky ears are tall, alert, and slightly rounded at the tips.
Step 3: Draw the Face
- Add two almond-shaped eyes.
- Draw a small triangular nose at the tip of the snout.
- Add a simple smiling mouth beneath it.
- Sketch the classic husky mask markings around the eyes and across the face.
These markings are key to giving the husky its signature look.
Step 4: Draw the Body
Behind the head, draw a long oval shape tilted slightly forward. This will be the main body keep it slightly fluffy along the edges.
Step 5: Add the Legs
Draw four legs beneath the body: Make the front legs straight and the back legs slightly angled for a natural sitting or standing pose. Husky legs are sturdy with thick, soft-looking paws.
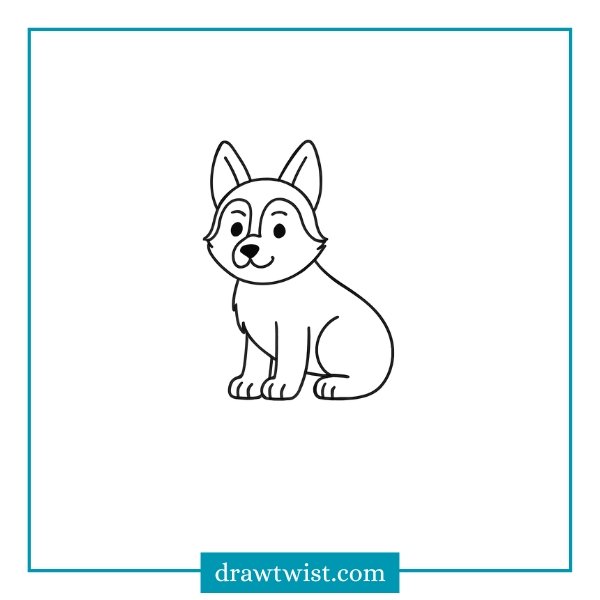
Step 6: Draw a Fluffy Tail
Huskies have large, curled, fluffy tails. Draw a thick curved tail sweeping upward, adding soft fur lines for fluff.
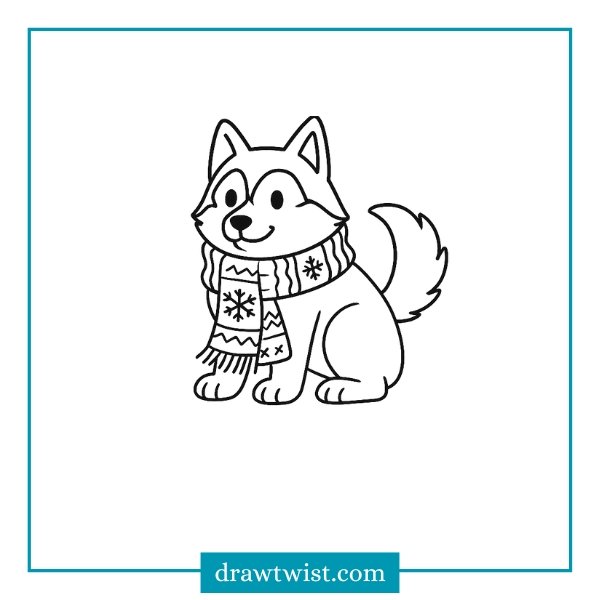
Step 7: Add the Christmas Touch
Wrap a big, cozy knitted scarf around the husky’s neck. Add snowflake or zigzag winter patterns to give it a festive Christmas feel. Make the scarf ends hang down or flutter to the side.
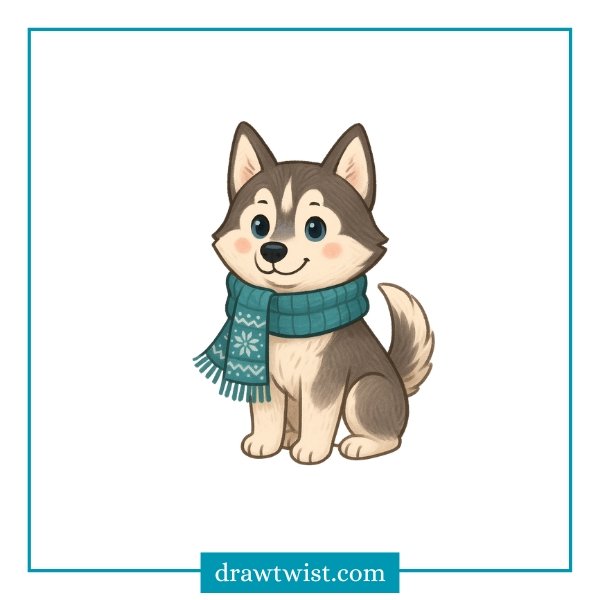
Step 8: Color Your Christmas Husky
Use these colors for a warm winter look:
- Fur: Two-tone gray and white (typical husky pattern).
- Scarf: Blue, teal, or red for festive vibes.
- Cheeks: Light pink blush marks.
- Eyes: Blue or brown.
Add slight shading to bring out the fluffy fur texture.
Tutorial 3: How to Draw a Christmas Corgi (Chibi Style)
Style: Chibi (big head, tiny legs, super cute)
Step 1: Draw a Big Rounded Head
In chibi art, the head is the main feature it should be much larger than the body. Draw a big rounded shape, almost like a soft circle or a slightly squished oval. This large head creates the classic chibi charm and gives you enough space for big facial features later on. Keep the lines smooth and soft to make the corgi look gentle and adorable.

Step 2: Add Giant Ears
Corgis are known for their big ears, and in chibi style, they look even cuter. Draw two large, triangular ears on top of the head, but soften the tips so they look rounded rather than sharp. You can angle them outward slightly for a playful expression. Add a small inner-ear line to give them shape and detail.
Step 3: Draw the Face
This is where the personality comes alive.
- Draw large circle eyes the bigger they are, the cuter the corgi looks.
- Add a tiny oval nose in the center of the face, low on the head.
- Draw a small “W” shaped mouth just below the nose for a sweet expression.
- Add two round blush circles on the cheeks for that cozy holiday vibe.
You can also add tiny eyebrows or extra sparkles inside the eyes to enhance the chibi style.
Step 4: Draw the Small Body
Keep the body very small compared to the head that’s the key to chibi proportions. Draw a simple bean-shaped or oval body right beneath the head, leaving no neck (or a barely visible one). The smaller and rounder the body, the cuter the result.
Step 5: Draw Short Legs
Corgis naturally have short legs, but in chibi form, they become extra tiny. Draw four small stubby legs with soft, rounded paws. Keep the legs simple just short tubes or tiny bean-like shapes. Chibi legs rarely show joints or details, so less is more here.
Step 6: Add a Christmas Sweater
Now bring in the holiday theme. Draw a cute Christmas sweater wrapped around the corgi’s tiny body.
You can decorate it with:
- zig-zag stripes
- snowflakes
- mini Christmas trees
- hearts or stars
Add ribbing lines on the edges of the sweater to make it look knitted. Make sure the sweater fits snugly and looks soft and cozy.

Step 7: Tail + Extras
Add a short fluffy corgi tail sticking out from the back just a tiny curved shape with soft edges.
For extra Christmas magic, you can add:
- Christmas lights wrapped around the body
- a Santa hat
- candy canes
- tiny sparkles around the corgi
- a gift box beside the feet

This step is optional but adds a lot of charm and personality.
Step 8: Color the Christmas Corgi
Time to bring your chibi corgi to life with color.
Use the classic corgi palette:
- Eyes: Brown or dark chocolate
- Fur: Warm orange + white patches
- Sweater: Red and green (Christmas classics)
- Blush: Soft pink circles

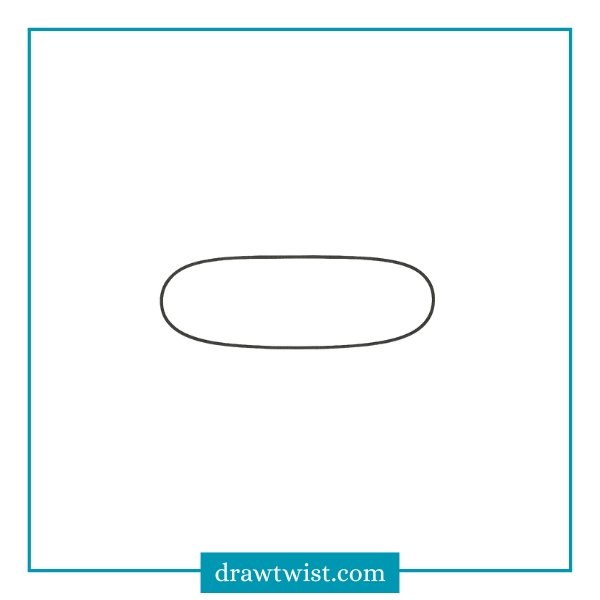
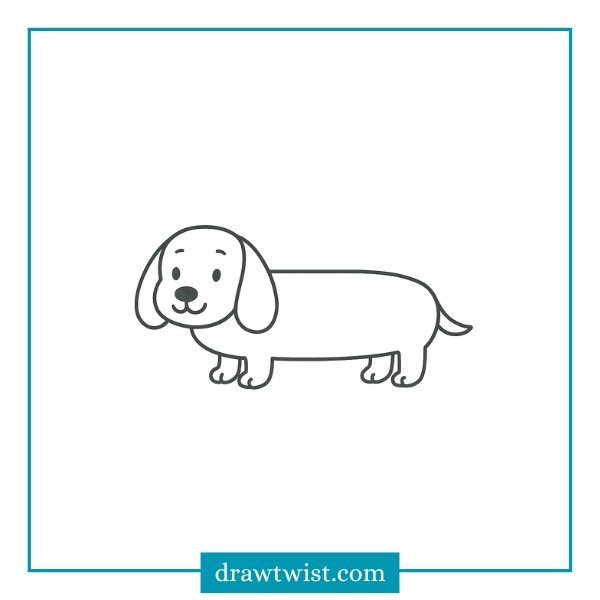
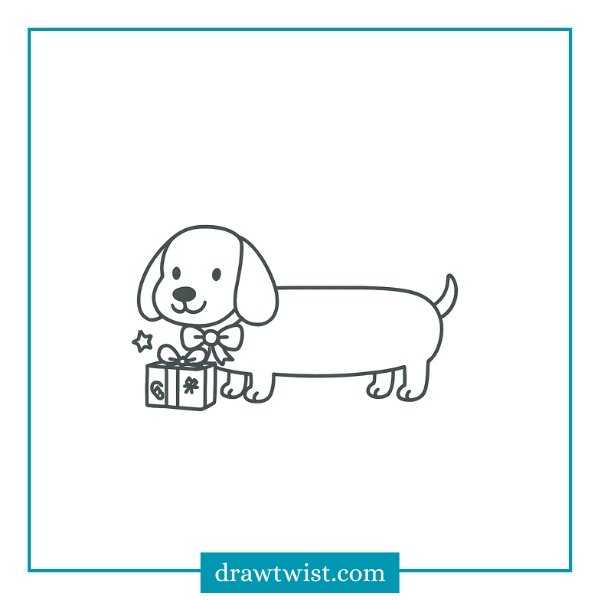
Tutorial 4: How to Draw a Christmas Dachshund (Gift Box Pose)
Style: Long body, simple doodle, perfect for kids.
Step 1: Draw a Long Oval Body
Start by sketching a long horizontal oval this will be the dachshund’s signature long body.
- Don’t worry about being perfect; dachshunds look cute even with wiggly shapes.
- Make it stretched out, like a sausage shape.
- Keep the edges round and smooth so the dog looks friendly.
This oval forms the entire body structure, so draw it lightly if you’re sketching.
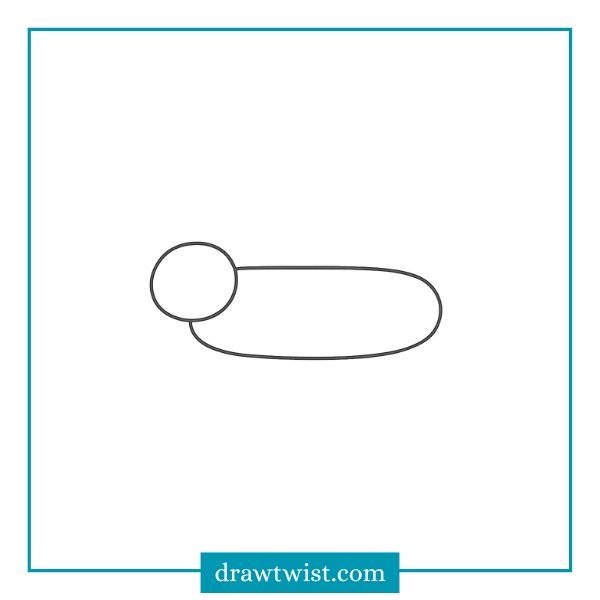
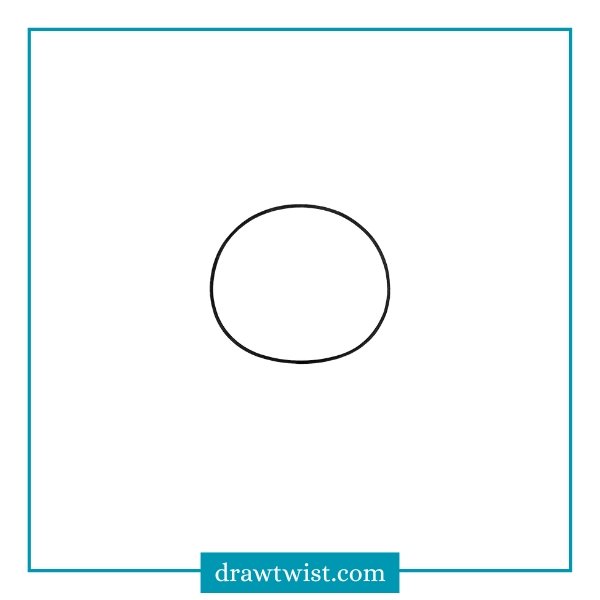
Step 2: Add a Small Head
On the left or right side of the oval, draw a small circle for the head.
- The head should be much smaller than the body classic dachshund style!
- Position it slightly overlapping the oval so the dog looks attached naturally.
This creates a cute contrast between the long body and tiny head.
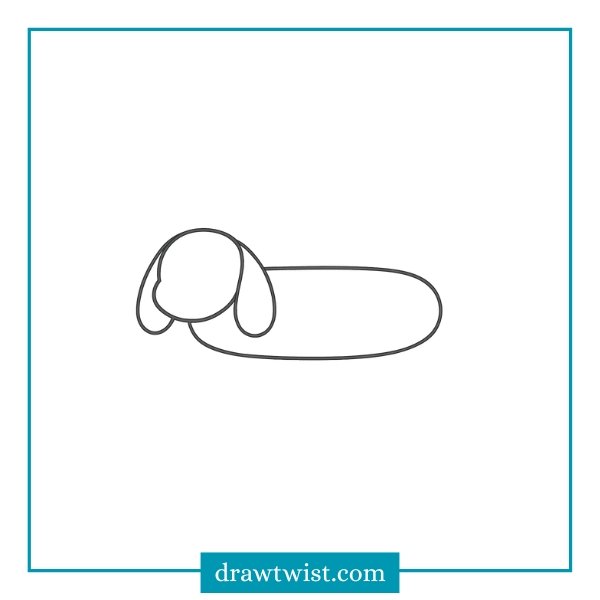
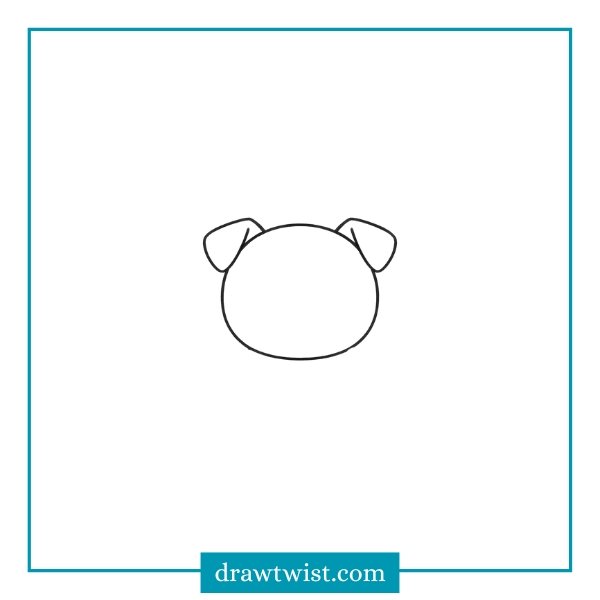
Step 3: Draw Long Floppy Ears
Dachshund ears are long and droopy perfect for doodling.
- Draw two long curved ears hanging down from each side of the head.
- The ears can be stretched teardrop shapes or soft, wavy lines.
- Let them hang low to emphasize the dachshund look.
These ears instantly add character and charm.
Step 4: Add Face Details
Time to give your dachshund a sweet expression:
- Add two tiny dot eyes small eyes make doodles extra cute.
- Draw a small round or triangular nose near the bottom of the head circle.
- Add a simple smile, like a curved “U” or a gentle wave.
You can also add little eyebrows or blush dots for extra personality.

Step 5: Draw the Tiny Legs
Dachshunds have adorably tiny legs and doodle style makes them even simpler.
- Draw four tiny legs under the long body.
- Each leg can be a short line with a little bump at the bottom for paws.
- Don’t add too much detail simplicity is part of the charm.
They should look stubby and cute, almost like little stumps.

Step 6: Add a Curved Tail
Now draw a short tail at the back.
- Make it a curved upward tail, slightly pointy at the end.
- Keep it small dachshunds don’t have big fluffy tails.
A slight curve adds a happy, wagging look.
Step 7: Add Christmas Props
Now the fun festive part!
Gift Box
In front of the dachshund, draw a simple gift box:
- Start with a square or rectangle.
- Add a ribbon wrapped around it.
- Draw a big bow on top.
You can angle the gift box slightly for a playful look.
Christmas Ribbon or Scarf
Add a ribbon around the dachshund’s neck:
- For a bow tie: draw one oval on each side of a small circle.
- For a scarf: wrap a long curved shape around the neck and let one end hang down.
You can also add:
- Candy canes
- Stars
- Mini ornaments
- Snowflakes
These extra doodles make the drawing more holiday-themed.
Step 8: Color Your Christmas Dachshund
Bring your festive doodle to life with cheerful colors!
- Fur: Warm brown or chocolate brown
- Ribbon/Scarf: Bright red, green, or candy-cane stripes
- Gift Box: Green, red, gold, or pastel colors
- Cheeks: Soft pink blush
Add small highlights in the eyes or shine on the gift box for extra cuteness.
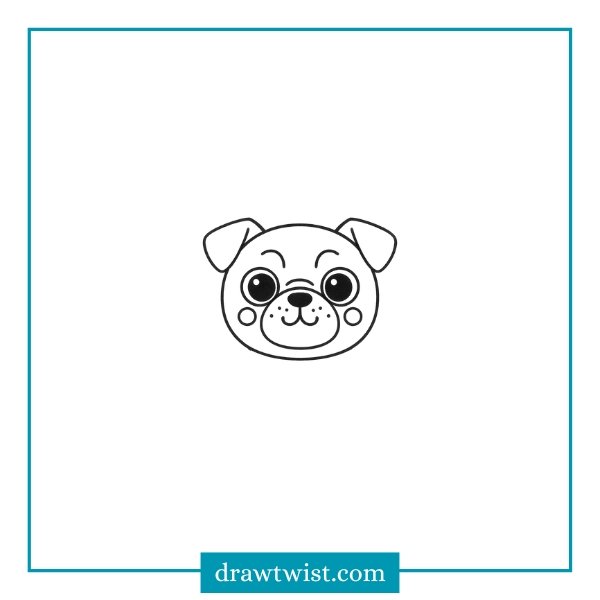
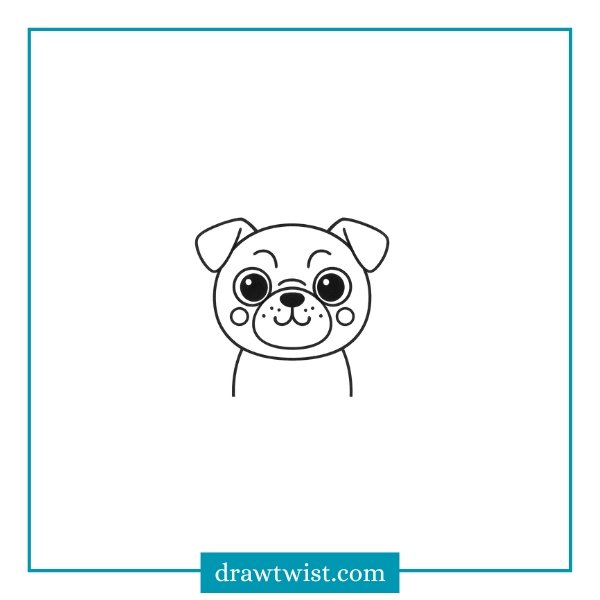
Tutorial 5: How to Draw a Christmas Pug (Reindeer Costume)
Style: Cute cartoon with round face, wrinkles.
Step 1: Draw a Big Round Head
Start with the most important part of a pug: the head!
- Draw a large circle or very round oval in the middle of your page.
- Pugs have big, round faces, so make this shape quite large compared to the body you’ll draw later.
- You can slightly flatten the bottom if you want the face to look a bit squishy.
This oversized head sets up the cute cartoon proportions and gives you lots of space for the facial details and wrinkles.
Step 2: Add the Ears
Next, add the pug’s little floppy ears.
- On each side of the top of the head, draw a small triangle or rounded flap that droops downward.
- Keep them short and soft-looking, not tall like a husky’s ears.
- You can angle them slightly inward or outward to give the pug a curious or playful look.
These tiny ears help the pug look extra round and cuddly.
Step 3: Draw the Face
Now we give your pug its signature squishy expression.
- Eyes
- Draw two large round eyes close to the center of the face.
- Pugs have big, expressive eyes, so don’t be shy make them nice and big.
- Add a smaller circle inside each eye for the pupils and leave a little white highlight to make them look shiny.
- Nose
- Draw a small round or oval nose between and slightly below the eyes.
- You can shade it in or leave a tiny highlight for shine.
- Mouth & Wrinkles
- From the bottom of the nose, draw a short line down.
- Then add a small “W” or “3” shaped mouth for a cute, smiling expression.
- To show pug wrinkles, add curved lines around the nose and mouth:
- One curved line under each eye.
- A soft “U” or two around the muzzle area.
- Cheek Circles
- Add small circles or ovals on each cheek for blush spots.
These simple details give your pug a soft, friendly, slightly squishy look perfect for Christmas art.
Step 4: Draw a Small Body
Pugs have compact little bodies, especially in cartoon form.
- Under the head, draw a short oval or rounded rectangle for the body.
- Keep it smaller than the head that’s what makes it cute and cartoonish.
- You can attach it directly to the head with almost no neck, or draw a very short neck line.
Think of the body as a soft potato shape: short, round, and cuddly.
Step 5: Add Legs
Now let’s give your pug some stubby little legs.
- Draw four short legs at the bottom of the body.
- Each leg can be made with simple straight or slightly curved lines coming down, ending in round paws.
- Indicate toes with short curved lines on each paw if you like, but keep it simple this is a cartoon style.
The legs should look chunky and short, almost like little pillars holding up a fluffy marshmallow body.

Step 6: Draw the Tail
Pugs have adorable curly tails, and that’s super fun to draw.
- On the back side of the body, draw a small spiral shape like a loose “@” symbol or a snail shell.
- Keep it tucked close to the body, not too big.
This curly tail instantly makes the pug recognizable.

Step 7: Add the Christmas Reindeer Costume
Time to transform your pug into a Christmas reindeer.
1. Reindeer Antlers
- On top of the head, draw a headband or simple band that sits across the top of the skull.
- From this band, draw two reindeer antlers, one on each side.
- Each antler can be drawn like a branch: a main line going up with two or three smaller branches sticking out.
2. Rudolph Nose
- Turn the pug’s nose into a Rudolph-style red nose:
- Make it slightly bigger and rounder than a regular nose.
- You can draw a small highlight circle inside to show shine.
3. Christmas Bell Collar
- Around the neck, draw a collar band a simple curved strip.
- Add a small bell hanging from the center:
- Draw a circle with a tiny “U” or dot at the bottom.
- You can draw a small loop that attaches the bell to the collar.
- You may also add small jingle bells spaced around the collar or a bow on the side for extra cuteness.
Optional extras:
- Tiny stars or snowflakes around the pug.
- A candy cane next to the paws.
- A little Christmas present by its side.
All these details make the drawing feel festive and fun.
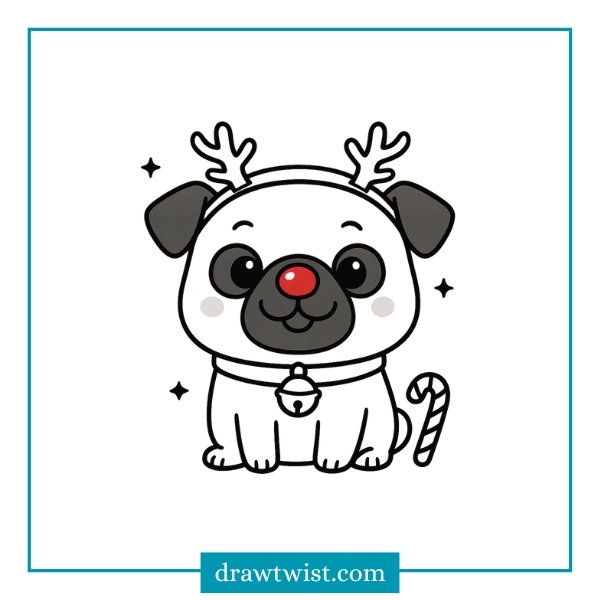
Step 8: Color Your Christmas Pug
Now bring your reindeer-pug to life with warm Christmas colors. Dark brown or black, with a little white highlight left uncolored.
- Fur / Body: Use light beige, cream, or tan for the body.
- Make the muzzle, ears, and around the nose darker, like brown or dark gray, to match typical pug markings.
- Muzzle & Wrinkles: Usually a dark brown or charcoal color to show the classic pug face.
- Nose: Color the Rudolph nose bright red so it pops.
- Antlers: Use brown tones (light to medium) for the antlers like wood or real reindeer antlers.
- Collar & Bell: Collar: Red, green, or striped for a Christmas look.
- Bell: Yellow or gold, with a tiny darker spot for shading.
- Cheeks: Soft pink blush circles on each cheek for a cozy winter look.
- Eyes: Dark brown or black, with a little white highlight left uncolored.

Understanding Basic Dog Anatomy
To draw a believable (or cute cartoony) dog, it’s helpful to understand a few anatomy basics. You don’t need to memorize every muscle just grasp the shapes.
Head Shape
Dogs have rounded skulls with slightly elongated snouts. For cartoon styles, we keep the head more circular.
Body Shape
Most dogs have:
- A rounded chest
- A slightly narrower waist
- A curved back
- Four legs that taper downward
Legs and Paws
Front legs are straight; back legs bend more. Paws are simple ovals in beginner-friendly drawings.
Ears
Ear types help define breed:
- Pointed (husky)
- Floppy (lab)
- Droopy (basset hound)
Tail
Curly, straight, fluffy choose the style that fits your character.
Understanding these basics will help you design a Christmas dog that looks balanced and cute.
Common Mistakes (and How to Fix Them)
1. Stiff Lines
Fix: Use softer wrist movement and sketch loosely first.
2. Uneven Eyes
Fix: Use guidelines before finalizing the face.
3. Hat Looks Odd
Fix: Make sure it follows the curve of the dog’s head.
4. Paws Look Flat
Fix: Use small oval shapes for toes.
5. Colors Look Flat
Fix: Add darker and lighter tones for depth.
Read More: how to draw elf christmas, How Do You Draw Christmas gift box, Easy Christmas Tree Doodle
Drawing a Christmas dog is a delightful way to embrace the magic of the holiday season. Whether you’re creating handmade cards, practicing your drawing skills, or crafting something cute for family and friends, this project brings together creativity, festivity, and joy.
Remember: there is no “right” or “wrong” way to draw your Christmas dog. Make it fluffy, goofy, tiny, elegant, chubby, or majestic. Add scarves, hats, bells, sweaters whatever makes it feel festive and uniquely yours.